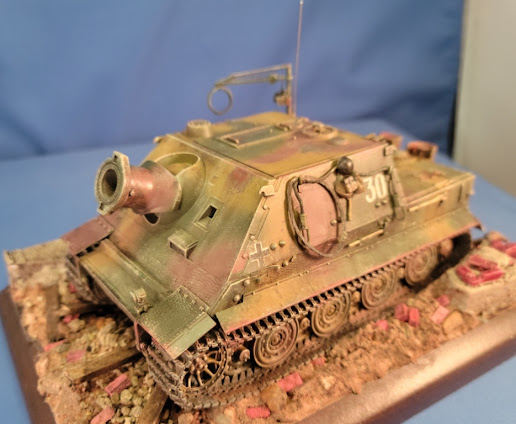
Tamiya 1/48 scale kit with added zimmerit. This was one of those easy kits... until you get to the missing details. Like what you ask?
Sunday, July 25, 2021
Sturmtiger
Wednesday, July 14, 2021
Panzer II C
This is a 1/72 PzKpfw II Ausf C from First To Fight. It is a simple kit that comes with a small magazine of a few pages containg photos, drawings, & info about the object being modeled. Unfortunately, the magazine is all in Polish.
Model was painted with Model Master acrylics and weathered with oil paints. I used the base to practice applying static grass with my applicator. The grass used is 4mm long.
Emart RGB LED Photography Lights
Monday, July 5, 2021
Panzer IV Ausf. D
Now I have completed the Tamiya 1/35 scale version to compliment the Bandai 1/48 scale version I completed a few months back.
Friday, July 2, 2021
Marder Madness
My latest fling has been modeling the German Marder. Of course I had to find and buy all the Marder variants that existed (originally trying to stay in 35th scale). Sometimes the chase to get what I want is as much fun as building the kits. I've got three under my belt so far, the latest being the 35th Marder III from Tamiya. I strayed a bit with the 48th scale Tamiya kit of the III just because it was cute. None of them are finished, each sort of stalled here at the end. I'm going to try to finish them this holiday weekend. I'm still learning with the whitewash and the mud, but I'm getting there,
To my eyes he Marder I looks to be kind of disproportional to the III. I did not really notice it until I saw the pictures. Both are Tamiya 35th, so I'm just thinking it's me.
I used Ammo by MIG acrylics for all the painting and the foliage is photoetched. I took photos on my iPhone on my workbench.
Thanks for looking - George


