Tuesday, June 30, 2020

Need Jon Baker Build Idea?


Still in need of an idea of what to do for the Jon Baker Build? How about this:


More info on the "real" gun(s) at Tanks-Encyclopedia.com

Wednesday, June 24, 2020

M3 LEE (early)

This is the Takom M3 LEE kit in 1/35 scale.  I have built it pretty much straight from the box except for stowage which came from Value Gear.

I used Ammo by MIG acrylic paints with pre-shading done with darker colors and some modulation with both lighter shades of the base color and oils.


This project went smoothly (for a change). My weakest skill set is weathering.  It kind of scares me at times.  I consider my self a decent fabricator as well as an OK painter.  When it gets to weathering I freeze-up.  On this kit I decided to just let go and try a bunch of different products and techniques.  In the pics I see the warts and some stuff I got to fix, but I'm happy with the end result.

I'm working on a base with a few figures (another weak spot in my skills - but getting a bit better). 

I read an article in an art magazine that stressed the importance of creative people finishing projects even if there are warts and mistakes.  I have to admit it does feel good to claim something (the kit) as done.

Thanks for looking
George

Monday, June 22, 2020

TAMIYA MERKAVA MK I

 This is Tamiya's Merkava MK I in 1/35.
 Kit was built right out of the box with the addition of a Legends IDF Stowage set, and donated chain.
 Vehicle was painted with Vallejo Sinai Grey. It was given a pin wash and weathered with Vallejo pigments.
 The figure came with the kit.
 I built this model back in the early 2000's and gave it away, so I decided to get a new one and give it another shot.
 The kit was typical Tamiya, and it is possible to build in a few days. The detail is nice, but it could use some enhancements.
All in all, I am pleased with the way she came out. Building Tamiya kits is a pleasure and this one was no different.

Thursday, June 18, 2020

Trumpeter BMP-2D

This the Trumpeter BMP-2D in 1/35. Back when I was getting into this hobby in the 1980's, there was a distinct lack of mid and late Cold War subjects to model. This is no longer the case, so I was excited to acquire and build this piece as it was one of my favorite vehicles.
 This kit is finely molded with plenty of details and a complete interior. I decided to only build the interiors at the Drivers position, and the turret since this would require minimal effort. This kit contains 470+ parts, and many of them are quite small.
 The Driver figure is from Verlinden and was painted with Vallejo acryllics.
The model was painted with Tamiya acryllics, and weathered with Vallejo pigments and a pin wash, with the addition of some Vallejo thick Brown mud.
The antennas are from RB models and worked out quite nicely.

Here is a quick view of the turret interior. I have yet to "weather" it, but will probably do so in the next couple of days.

Thursday, June 11, 2020

Syrian T-55A

Well, the hits keep coming. Here is a quick build.  I needed a break from the scratch build projects, so of course I go to my Tamiya shelf.  Finished this one in 2 weeks, not that I was trying, just that there wasn't a stopping point. It all worked out so well. The kit I bought used and included a completed set of Fruil tracks. I only needed to cut off the pin heads. This really gave it some weight.

Though the kit was intended to be Russian version, I wanted to make it 60's Syrian so tried to use the options provided for the various configurations. It didn't matter much as the vids I found on these tanks were so beat up, I could have done just about anything to it.

The camo pattern was custom mixed Modelmaster enamels. I certainly didn't beat up the tank, but allowed for enough wear and tear without ripping off the stowage bars or fenders.  I did need to add in the fuel lines and light cables as well as some appropriate stowage. I also had some leftover decals that were appropriate.

Well that makes 27 completed projects this year, 20 of them Armor related. 
Vince B.  6-11-20

Wednesday, June 10, 2020

Russian Ball Tank

This is the 1/35 scale Miniart Kit. I am not a big fan of Miniart, but just had to see what this was all about. It is hypothetical and could never have practically operated in this configuration. Though it is set up for a crew of 5, barely 2 people could fit. The weapons and engine etc were definitely from 1/35 scale kits, but the seats seem to be for 1/48 scale figures.


Though the solid cast ball halves would have been welded to the interior frame, there was too much interior detail to let go unseen, so I decided to pose the model in a split hull configuration.


As much fidley bit details as there were, I thought of a few more which could be added if I decide to do other version of this kit.
I decided to have some fun with the camo pattern which I free hand airbrushed.


Vince B.  6-10-20

Sunday, June 7, 2020

Meng Magach6b Gal Batash Final

 Been a bit out of pocket. So I have painted and added the figures, and finally got the best mounted to the base.
 Since the suspension actually works, I need to find a base that would show off that feature without too much trouble.
The figures are resin by Valkyrie. They are very nicely molded and come with extra heads; they have been painted with a combination of Tamiya and Vallejo Acryllics. I very much enjoyed working on this project and being able to compare the two kits with Vince.

Monday, May 18, 2020

Cyber Hobby's Israeli M-50 Super Sherman

Another one in my way too large stash of started kits, that is now moved on -- to Finished!!  This is the IDF M-50 Super Sherman, in 1/35th scale, as it fought on the Golan Heights in the Six Day war of 1967.  It is painted with Vallejo paints, dark sand as the base coat with pale sand to lighten it

Box art, the tank in its black undercoat, and the paints used.

I added Star decals, but you can barely see the white lettering on the base coat.  Guess next time I will have to select the lettering with the black outlines..

The big gun almost staring right at you!


You can see the turret marking better on this one!

Saturday, May 9, 2020

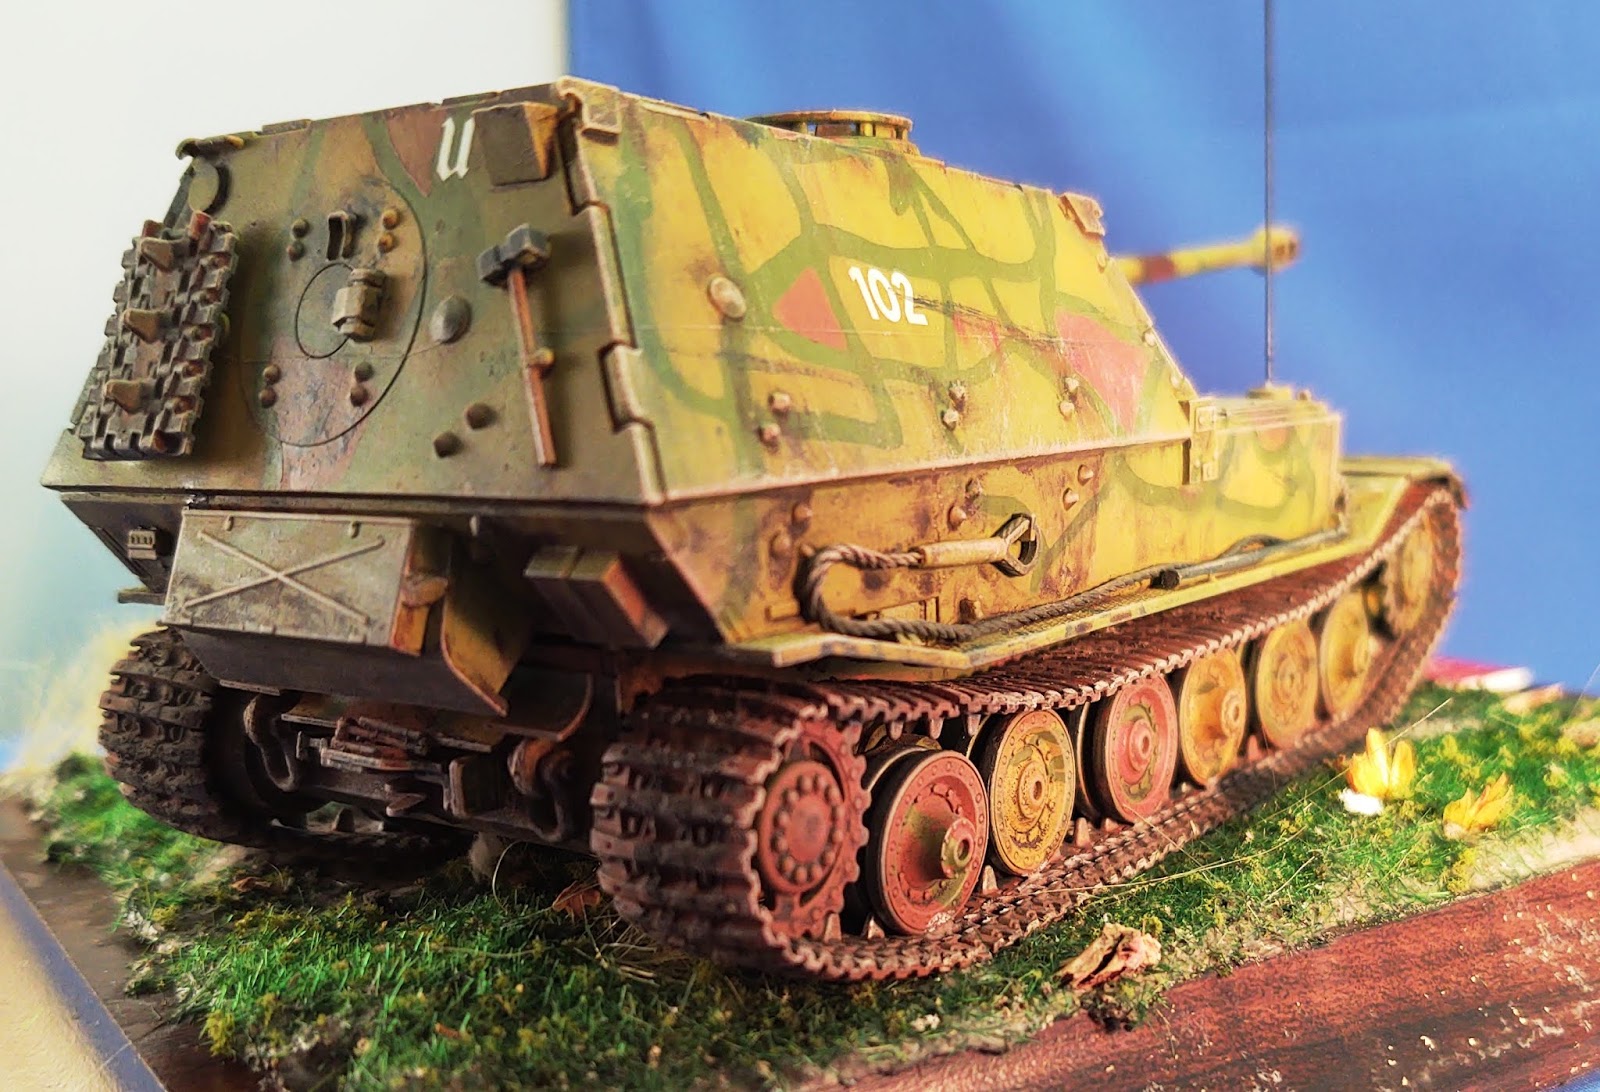
Elephant

1/48 scale Tamiya kit, super fit, especially the length and link tracks. Very impressed with the details.  The main gun allows full movement vertically and laterally.

The drive sprockets have polycaps making it easy to align the single track links with the lengths.

The only add on was a stretch sprue antenna.

I had fun with the camo pattern using the putty masking and airbrushing.

 
Vince B  5-10-20


Sunday, May 3, 2020

BMP-3F

Back when all of us met at the Lone Star Flight Museum for a group build around the 'real things', we met a young Air Force officer that trained drone pilots for actual missions, everywhere and any where.  LTC Chris Remy told us stories about how his young pilots were having to make split second decisions on whether a vehicle was friend or foe.  He was organizing a group of modelers to build the real thing so he could display them at the flight center to help as an aid in identification.  He then came to one of our meetings and talked about his job and project.  And then he even supplied the kits for us to build!

I chose the Trumpeter BMP-3F.  I found some after-market decals of BMPs from UAE and Indonesia.  I selected one of the UAE vehicles that was part of the Saudi led coalition that went into Yemen in 2015 to stem the tide of that country's civil war.  I matched the colors to be Polly Scale US Desert Storm Sand and MIG-071 Khake as best I could from the the color palat provided with the decals.

As you scroll thru our blog, you will find several more vehicles built for the Drone Viz Recce Project Display at Ellington JRB, Houston.

Thanks, Chris!


Thursday, April 30, 2020

M151 MUTT w TOW

I would think that all MUTTS have TOEs.... 😏  OK Thats a Paul punn.

This is the simple Tamiya kit that everyone has or had. Great fit of course.  There are so many versions of the JEEP used for various strategic functions.


This version mounted a single TOW launcher instead of an M60 machine gun.


The kit came with 2 versions of decals and options to fit.  Last time I built the regular ARMY version, but this time I wanted to include the snorkel equipment for the Marine Corps.


I did some minor detailing adding the wires and cables for the TOW controller and radio.


Vince B.  5-1-20


Sunday, April 26, 2020

MENG MAGACH 6B 8th PART


MAGACH 6B BUILD
PART 8

So, it's done. I have completed the track assembly, painting and weathering. The base color is the Vallejo IDF Sinai Grey. I painted the front tow cables Tamiya Gunmetal before I mounted them to the hull. Once they were painted, I was able to mount them with the pins provided in the kit. Each tow cable set was a separate piece and perfectly molded in platic. The tracks were spray painted Testors Flat Black and then over sprayed with Tamiya Gun Metal. The hull was given a gloss coat, a pin wash with Tamiya Black Panel Liner. The dull coat was done with Vallejo Matt Varnish. Just a note here. Typically I use the Testors Lusterless Flat from a rattle can, but I notice it has a tendency to make anything it covers, darker then it normally would be. I decided to try the Vallejo Matt Varnish on my last model and was quite pleased that it didn't change the tone of the underlying base coat. Based on this experience I was happy to utilize it again on this model.
After the dull coat was applied, I began weathering the machine guns and some of the other edges on the turret with Uschi metalizer powder. The model was dusted primarily with Vallejo Desert Sand Pigment Powder. I also added Vallejo Natural Sienna in selected areas. The tracks were gone over with the Vallejo Desert sand and the Vallejo Natural Sienna in two different layers, based on photos of the real vehicle these colors were a very good match. After the layers of dust were applied, I went back and did some of the panel lines with Tamiya Brown Panel Liner over the dust layer I have applied. I also did this on the wheels which also had the dust layers applied. This gives a really nice affect as it (I think) it gives a more natural look.
The antennas were painted with Vallejo Ivory and tied back with EZ-line (which is a great product). I used the Tamiya Soot weathering product on the exhaust diffusers, and also on the main gun muzzle cap.
Currently, I am still awaiting the arrival of the crew and I have to work out a base for it, but I am pleased at how she came out.

To sum it all up, this is a nice kit. It has some small issues but nothing that could ever be considered a show stopper. This is a very interesting piece and is visually appealing from any angle. If you are a fan if IDF armor this would be a great addition to your collection.

Cheers.
WL
View from the front

Turret close up
View from the left side
View from the right
View from the top
From the rear