Wednesday, June 16, 2021

Stug III Ausf. G


 This is the TAKOM BLITZ kit that came out last year. Really good fitting model. Just enough detail (photo etch) to make it interesting. 

I did have to drill out the antennae mounts and make my own from K & S wire.

It was a pleasure to work on weathering and wear techniques with a bit of sponge. This was in combination with the oil washes. 

I was going to add stowage to the rear deck but decided not to cover up the nice details I worked on. 

Vince B. 6-16-21


Thursday, June 10, 2021

1/35 Scale Achzarit


This is Meng's 1/35 scale IDF Achzarit. It is part of the recent IDF kick that I have been on and basically built this one on a whim.

The Achzarit is a T-55 rebuilt as a heavy APC. This particular kit is the early version. The rear access hatches open but I chose to leave them closed.

The kit construction is pretty straightforward and was done right out of the box with zero modifications. I may put stowage on later, and perhaps some cree figures as well.

I used Mission Models IDF Sand Grey #1 which is supposed to have a green tint, but it doesn't. This paint sprays on well and does not require thinning for airbrushing, although I put about 5 drops of their thinner in the mix. Be careful is use this paint, as it doesn't take well to using tape for masking. It also doesn't take heavily thinned Tamiya paint being painted over it with a hand brush.
She was given a pin wash and I used Vallejo pigments for the dust and sand.


The kit comes with minimal phot-etch. The two side screens on the rear are PE as well as the mounting bracket covers. It also came with a number of very nice PE license plates, which I will be saving for future use.

This is a good kit and easy to build. I caught it on sale on Spruebrothers so it was quite affordable.

Wednesday, May 12, 2021

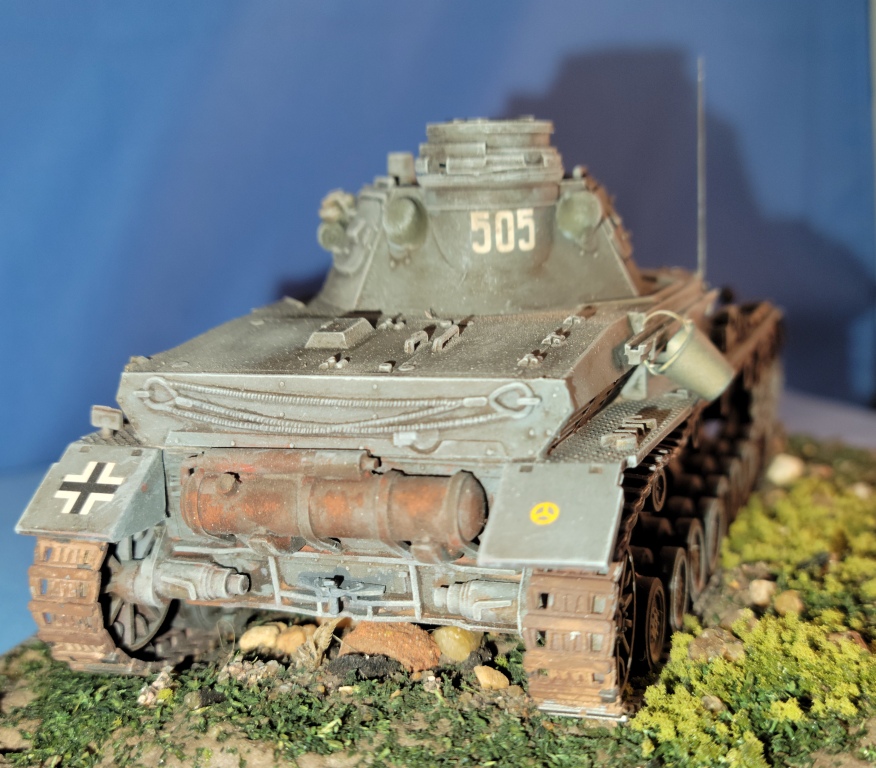
Panzer IV Ausf. D

 This is the old 1/48 Bandai kit. Out of the box with some added stowage. Very basic beginners kit, but it matches a 1/35 scale Tamiya kit I am building as well. Will make for a good comparison later.

I didn't do anything special, just painted, washed, dry-brushed and pigmented. The tracks on this are horrible and would recommend replacing with Fruils for a serious build but why waste them on an old Bandai kit.

Since I didn't do much to this it wouldn't last 5 minutes in a contest so I consider this E-Bay Fodder. 
Of course I used Modelmaster Enamels and mixed my own colors of blues and greys. Washes and weathering was done with mixed oils and pigment powders.
The bits of stowage were Black Dog. The spare tracks were from Tamiya kit. Yes, there is a bucket. I did have to add decals as the old ones disintegrated. 

Vince B.
5-12-21


Monday, May 10, 2021

Flakpanzer Panther with 37 MM Guns.

 This is a 1/35 Takom kit which comes with both the quad 20mm Turret and the 37mm Turret, which can be used interchangeably. Both turrets are complete.  

I used the Photo Etch screens on the engine deck so didn't want to cover them with stowage. I used oils and pigments for the weathering and rust. 
I chose to use the Fruil tracks as I didn't enjoy inserting the guide teeth sets into the length and link tracks  that came with the kit. 
The kit is great. The only fit issues were those I caused myself on the rear plate with the stowage and exhaust. 

I decided to keep the base simple and used a section from a Miniart set. The street lamp looked cool so I cut the plastic dome and inserted an actual bulb. No, it doesn't light up. 


Vince B. 

May 10-2021

Wednesday, May 5, 2021

HASAGAWA NUTCRACKER 1/35


Finally done. I actually finished the M.A.K. series Nutcracker last year, but never mounted it. The kit actually came with two 1/35 scale Mech suits. They are "Gustav" (left) and "Melusine" (right). These things are models in their own right and I am glad that I took the time to complete them.
The construction was easy enough, just different than building armor. Only one of them had  cockpit figure, but the modeler is supplied with two different heads for the "pilot"...for each suit. So, I have three spare heads that can be used for other projects. I painted them with a base coat of Tamiya Dark Yellow, then I masked them with putty and applied Tamiya JGSDF Green and then Tamiya NATO Brown. Once that was done, I gave them a gloss coat, paint chipping and then a pjn wash. After that I applied some Uschi Polishing Powder in selected areas, and topped them off with some Vallejo Pigments. I think they came out ok.
Once my little buddies were completed, I added them to the base with the Nutcracker. The nutcracker was a decent kit, and I had no complaints. Everything fit the way it was supposed to and there were minimal seam to putty over.

I painted the Nutcracker with Tamiya Dark Yellow, Tamiya Red Brown, and Tamiya Olive Green.  I then applied the German Ambush Camo dot pattern. 

i gave her the standard treatment (Gloss, Pin Wash, and Dull Coat heretofore known as the GPD treatment). The I applied a little bit of chipping and some pigments.

Since this is a Hover Tank, I had to mount it so that it appears to be hovering...like a Hover Tank. Once again, I used grout for the ground work with some Woodland Scenics Grass and Turf. I have been wanting the build this kit for while and I am glad it is finally competed.


Monday, April 26, 2021

British Heavy Tank Mk V Male.

 A full year in the making. The moment that you have all been waiting for... well many of you... OK, a few of you have been waiting for. This is the MENG Mk. V Male with completely detailed full interior. 

It was just too cool to close up, so I had to be creative.  I set it up as if it was a Museum exhibit with the sections cut away. I even included the display boards, runway ropes and simulated steel frame supports for the sections of the tank. I even used the spare track links for a display stand.

This was really fun to work on... OK, it was a tedious pain in the....tank.  Most of the linkages and tiny detail parts were tweezered. It was very difficult to hold onto anything without breaking something off. 


The coolest part was engine. I purposely left the covers off.  Can you imagine, they wanted you to close this up after all the work involved? Keep in mind that this is out of the box, despite it being left open.


I also added some interior back lighting, like they would do in a museum. I was also tempted to do overhead spot lights, but that was a bit much. 

This will compliment the similar arrangement I did on the German A7V. That didn't come with a detailed engine.

Vince B. 4-26-21


Tuesday, April 13, 2021

E-75 Pathmaker

 Another of the 1/72 scale Modelcollect Fist of War series, which of course I needed to enhance. I have a lot of scraps and leftovers from these kits, enough to collage.  I had a leftover King Tigerish turret which was perfect for this.  The kit came with a 120mm AA gun. 

The barrel is scratch built using styrene and brass rod. I used Evergreen sheets with tile pattern for the add on armor. There are some unseen hydraulic cables added to the leg mechanisms. 


The stowage is is a combination of Black Dog and Priser components.
The camouflage coloring was based on what I had planned for a fall forest scene 1945. I used Modelmaster and Humbrol enamels with the use of theraputty masks. 
The trees and groundwork were made from garden debris and chopped hemp rope with some bought clump foliage and grass scatter. 

Vince B. 4-13-21


Sunday, April 11, 2021

Somewhere in Saigon

 Since I had sold all of my Vietnam dioramas, I needed a new one for the display case. As I was formulating the layout with the soldiers working on the detailed engine in the front, Master Box released a new figure set. "Somewhere in Saigon"  which gave me the opportunity to expand the setting for the diorama. Then the dilemma... what to call it. I had two names narrowed down and as Don suggested, why not use both.

 
The build started with the old Tamiya M113 ACAV kit. This provided the basic details and interior I needed.  The engine compartment was sparse and I wanted the hood open. I studied what seemed to be a chaotic stream of pics, where there weren't two engines alike. I selected the details which I could fabricate by adding hoses and wiring, This was enough to allow opening of the compartment. I used two figures from the kit and some hand tools from an Italeri kit.

Then, there was the interior. I needed to add such details as the grab straps on the ceiling, radio, ammo cans and other stowage. This was a combo of misc resin and plastic items from my collection. I also assembled several of the paper carton prints. The drivers compartment was lacking in cable conduits and wiring. 

Doing this helped develop the rest of the story of trading goods for services. Food, cigarettes and cash for.... well, you get the picture. 


Now for the details on the roof of the vehicle. Needed a lot of stowage, misc. gear and weapons. I added wire antennae, straps etc along with making ammo belts for the 30 cal guns.


Overall, this was a fun build. The wall segment was a plaster piece from an old Verlinden building. Not sure where I got the resin side walk brick. The street was just plaster over a styrofoam sheet. The couch was a 1/24 scale scrap car back seat covered with tissue. 

Vince B.  4-11-21

Tuesday, March 30, 2021

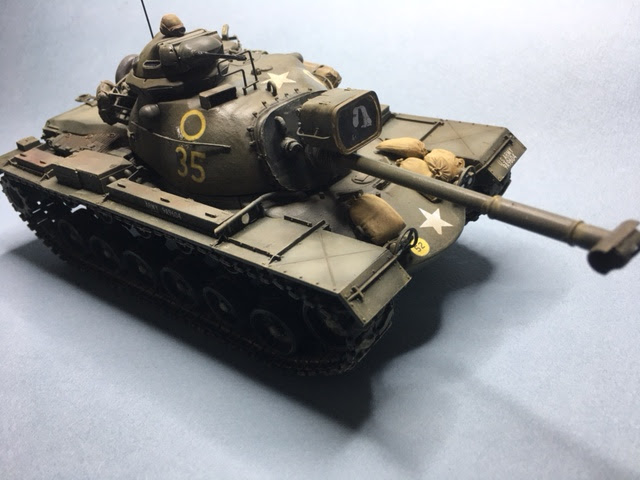
M-48 A-3 Patton

 This is Dragon's 1/35th scale M-48 A-3 Patton.  It is modeled after one from the US Army's 69th Armored Division, C Company, at the Battle of Khe Sanh in 1968.  The decals are from Star Decals.  Stowage is a mix of Legend stuff from Patton sets #1181 and #1306.  The Patton is painted with Vallejo paints from the 6 bottle set entitled US Army Olive Drab.  I only used 4 of the 5 shades of olive drab, up close, you can really see the difference in shading!  The usual washes and weathering was done, I did use "Pan Pastels" for the final shading.  I have used these before and I really like them and recommend them to our readers.


Now on to the next Patton, probably an M-60!!.  Enjoy!!

Wednesday, March 17, 2021

KEEPING UP WITH WERNER.....


I had to follow-up with my almost complete rendition of Tamiya's 1/35 Bradley Fighting Vehicle.

So far the build is straight from the box, except for some modification I did to the side skirts and some other decals from my left-overs.  I primed it with Tamiya rattle can grey primer and then used different shades of Ammo by MIG acrylics.


I have yet to finish weathering (right side) and I still plan on putting on some stowage.  I also have some other bits to add along with antennas.

It was my first Bradley too, and I appreciated the typical simple joys of a Tamiya experience.

Sneak Peek - not quite as far along, but here is my next Tamiya closing in on completion