Thursday, November 17, 2011


Tools used and displayed


Model Photos from the November 2011 Meeting


Wednesday, November 16, 2011

Here is my latest completion. It was for an IPMS USA Review that will posted there shortly.


Saturday, November 12, 2011


Here is the 1/35 Dragon MAUS and figures that were also just completed within the last 2 weeks


Here are some photos of the recently completed models:


German Gepard


1/72 Dragon Ferdinand


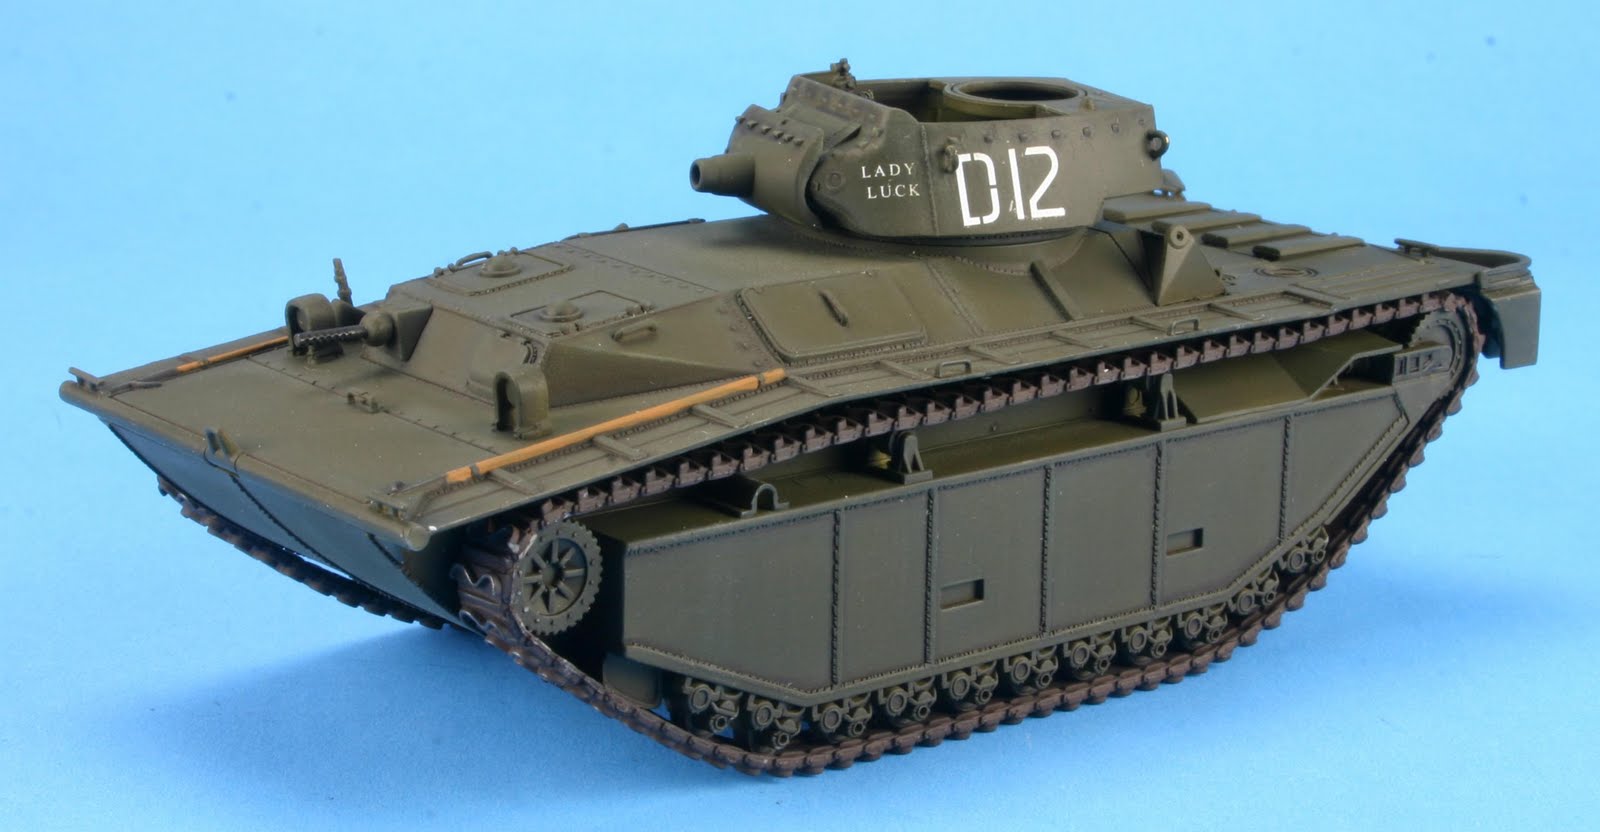
1/72 Dragon LVT-(A) 4


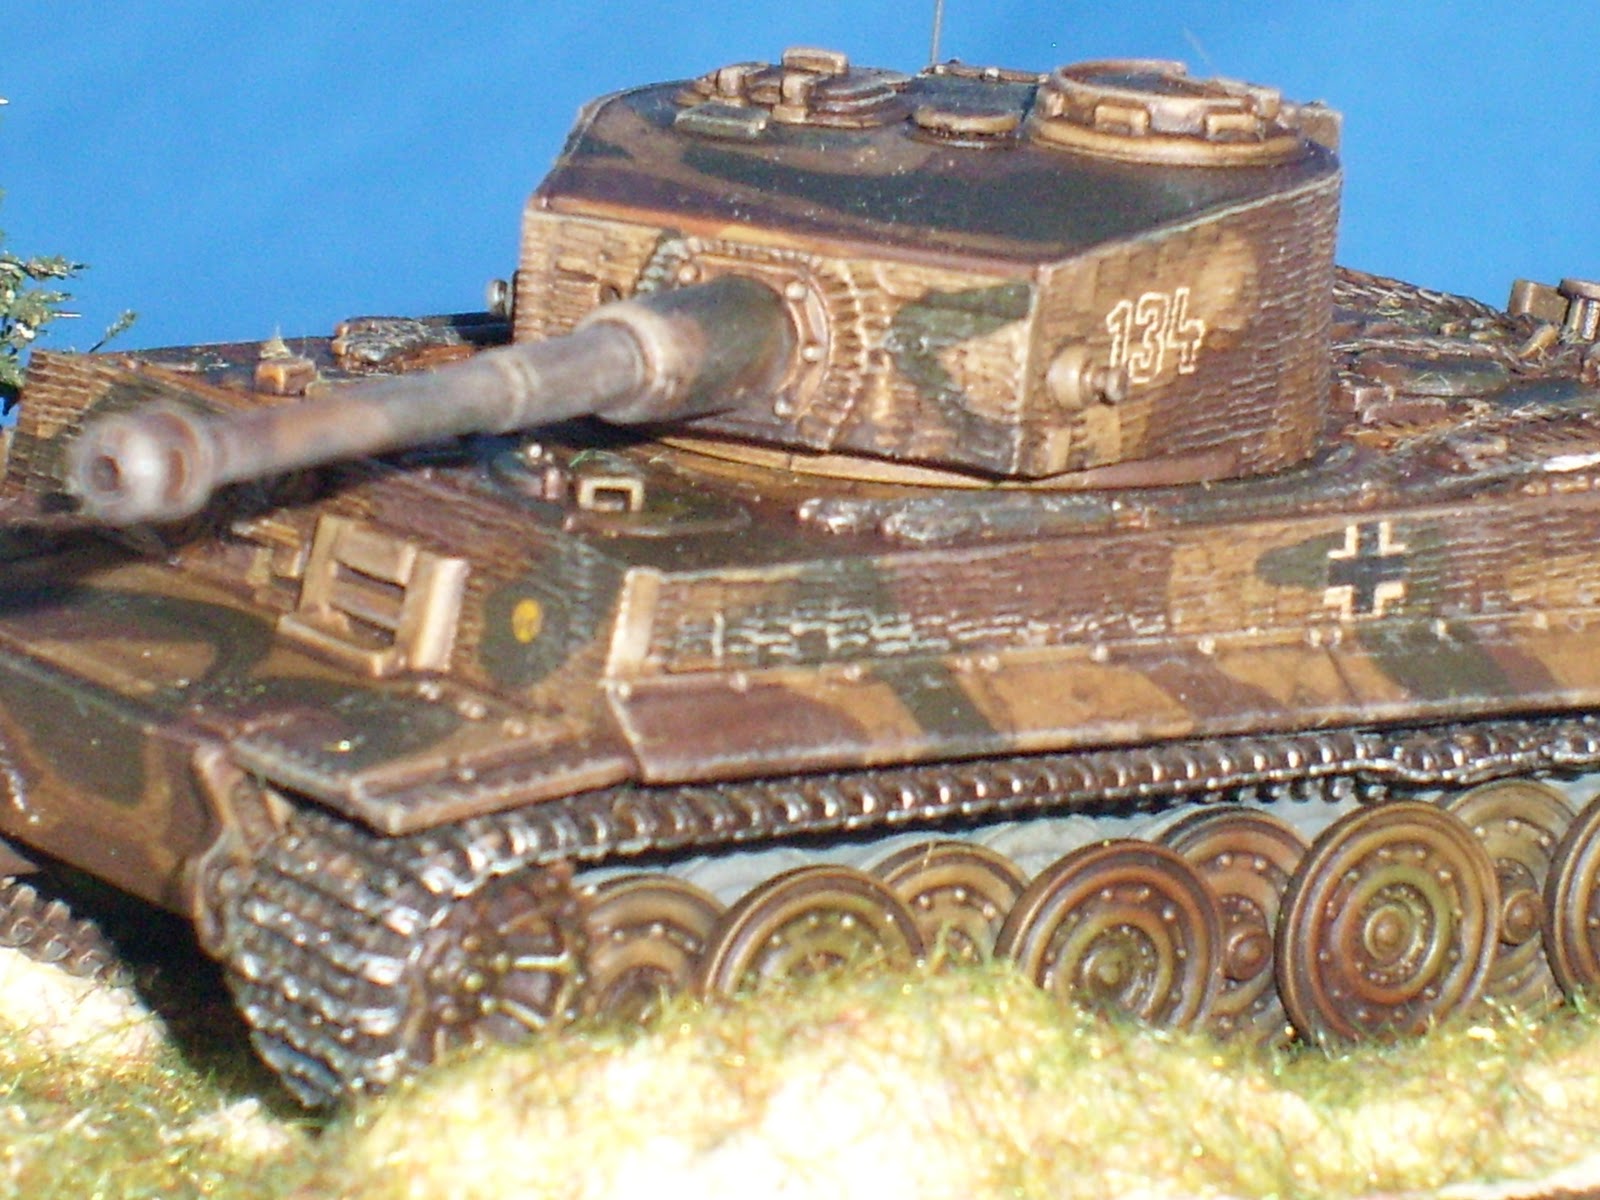
1/72 Dragon Tiger I


Tuesday, November 1, 2011

Tiger I Ausf 'E' Late

I somehow got this one finished well ahead of schedule. This is one of the early Dragon 1/72 scale kits. It all went together pretty well except the vinyl tracks. Hate those. The kit was out of the box. I didnt find any photo or film documentation showing that stowage was piled on the engine deck like all other tanks.

Base colors were airbrushed and then detailed by hand. After applying dullcoat and oil washed, I added decals and more dullcoating and more washes to dull the colors. Finally drubrushed the highlites and painted the tracks. Drybrushed the tracks then moved on to selecting the Preiser figures. I wasnt trying to make a diorama, just enough marching figures for effect.

After sanding and staining the base, I whipped up Sculptamold with Elmers Glue and acrylict artist paint and poshed the mixture into place. While it was setting, I coated the glop with white glue and sprinkled on the grass. I bolted the tank into place then the figures and foliage.

Ok. So I wasnt really finished with it. After some more research, I decided to add a few details to the Out of the Box tiger I. Not much difference, but I am adding the spare track links and the commander's turret mounted machine gun.  (11-7-11)

Vince Barrale
11-1-11


Sunday, October 23, 2011

Two great pictures worth seeing from the Libyan conflict.


For more:
MSNBC


Friday, October 7, 2011

Panzer III L

Sorry, it has been so long. I finished something ARMOR related. I threw together the 1/72 scale Revell Panzer III L. I had been studying the armor used in the Russian invasions and this inspired me to do a winter white wash. I had seen videos of Germans throwing buckets of white paint on with brooms and mops I did my best to simulate the effect in 1/72 scale. No I didnt scratchbuild a tiny mop, but I did use a worn out mop like paint brush for the final finish. I think it worked.

Wednesday, September 28, 2011

M4A1 76mm Update

Here's another update to the Tamiya Sherman I've been working on the past few weeks. The top got darker while the suspension got lighter. The slightly faded olive drab is significantly darker after a coat of Future floor wax and some Khaki and Desert Yellow highlights lightened the suspension. After painting some of the details and shooting another glossy coat of future, a final coat of Future mixed with Tamiya's flat base will tie it all together.


I also added a piece of Bare Metal foil to simulate the paint worn off the barrel by the recoil. I've had two sheets of this stuff for more than 10 years and still have plenty left. Once the final coats of paint are on, it should be difficult to tell that it's not metal. I should also point out that I had to do some minor surgery with some Mr. Surfacer and a sanding stick on the barrel when I discovered a slight seam about 20 mm long across the top.


Wednesday, September 21, 2011

Tamiya M4A1 Update


Here are a few more pictures of my in-progress M4A1. I've applied some base coats and highlights to the tank, which is completely assembled except for the rear grate and the stowage on the rear deck. I used Tamiya acrylics for all the airbrushing. I will use a combination of Vallejo acrylics and oils for the detail painting and weathering effects that will come later.

I painted a base of Fat Black on the entire lower hull making sure to get into all the nooks and crannies. I followed this with a pre-shade of the hull top with more Flat Black. As stated earlier, the grate on the rear was left loose and just pressed into place to allow for easier painting of the exhausts later. The hull has a base of Olive Drab followed by a highlight coat of Olive Drab and Dark Yellow mixed in no particular proportions. If you look closely, you can see some of the vertical streaking on the side. I intentionally mix it slightly on the light side since a coat of Future for the decals will darken the finish considerably and minimize the different paint tones.

After the upper hull was dry, I mixed some Flat Earth and Flat Black for the first set of earth tones on the suspension. I will apply some more highlights using different earth tones to bring out more of the detail later. I generally follow the logic that recessed details will be darker and those closer to the viewer will be lighter so the bogies will be painted in lighter tones.

I'll try to post more photos as I go along.

Sunday, September 18, 2011

Tamiya M4A1 76mm Late


Here's a quick update of the new Tamiya kit of the "M1 Super Sherman." I started to build this kit straight out of the box, but quickly decided that it needed too many details to bring it up to a more modern standard. Instead of the Israeli version, I chose to back date my model to represent a late WWII (Spring1945) built 76mm M4A1.

The kit provides the dated lower hull and suspension from previous incarnations of the original M4A3 kits which leaves plenty of room for improvement. Thankfully the new kit has sponson fillers included so it does make things somewhat easier. On the other hand, the sides of the transmission housing have huge gaps that had to be covered up with .010 Evergreen styrene sheet. The rest of the additions on the lower hull included adding details to the suspension by using much better road wheels and idlers from an old Academy Sherman kit, Grandt line hex bolts (#128), drilling the mounting holes for the trailing return roller arms, adding some missing bolts with .010 styrene punched with the Waldron micro punch set, and casting numbers from Archer Fine Transfers. These transfers are easy to use and I highly recommend them for any Sherman-based vehicle as they provide specific part numbers for certain features.

While I was working on the lower hull, I also added an escape hatch and engine access panel to the bottom. I also added more of the Archer casting numbers to the transmission housing and scratch-built the comb device and tow cable tie downs. The front fenders were improved by slicing off part of the kit parts and replacing them with more sheet styrene. The hull MG cover ring received some small rivets courtesy of the punch and die and the fender skirt attachments were made from .010 x .060 styrene strip and drilled using an old DML photo etch piece as a guide. Around the back, I added the spare track block holders from the box and detailed them with plastic strip, stretched sprue, and more punched discs.

The turret has some major mold misalignment on the back that needs some attention. I shaped, sanded, and filled until I was satisfied with the result. I eliminated the casting number from the turret top and replaced it with some more Archer casting numbers. I also took the time to add some large casting numbers on the side of the hull made by slicing the sprue numbers off a Dragon M4A2 kit that I happened to also be working on at the time. I used the gray styrene so that it would be easier to see while working to seal them to the surface. It takes a liberal use of glue, but too much can really ruin the numbers by melting them into the surface. The different colors help to keep this from happening.

To round out the turret I drilled the mortar hole out and used sliced sprue to make the lip around the edge. I also added some minor detailing to the kit .50 caliber MG in the form of a thumb trigger and more discs punched from sheet styrene. I removed some minor details and drilled the second antenna mount to accept a Dragon antenna part. The handles on the hatches were replaced with motor winding wire from Radio Shack.

Finally, I cobbled together some Tamiya, Legend, Ultracast and Armand Bayardi pieces to make the stowage for the rear deck. I sat the gear in place and used super glue to hold the pieces in place. I glued the items to the rear shelf and used some fine wire to secure them, but left the stuff on the rear deck free to make painting easier later. I mixed up some MagicSculp two part epoxy to make the tarps. I made four different pieces so I could paint them slightly different colors to add some visual interest by breaking up the monotony of the overall olive drab.

I still haven't quite decided what markings I will use. I'm considering finishing it with French markings since they are some of the most colorful, but the availability of the decals for this particular late war variant will probably be the determining factor.

Tuesday, September 13, 2011

In Progress DML Ersatz M10


Here are a few pictures of my base coated Ersatz M10. The construction was relatively problem free although I had more difficulty installing the Magic Tracks than I have encountered before.


I sprayed the Ersatz M10 first with inexpensive primer from Wal-Mart. Then I used rattle can flat black, again purchased at Wal-Mart. Next I broke out my new Grex pistol grip double action airbrush. After a few minutes spraying my practice tank, I sprayed the Erstz M10. I used Tamiya Olive Drab thinned with Tamiya's X20A thinner. I then lightened the OD with Dark Yellow and added highlights to the darker base coat.


I must say I really liked the Grex airbrush and glad I went ahead and made the investment in such a high dollar brush.

Monday, September 12, 2011

world of tanks

about 6 months ago fred posted something about this online game.......any away is a great game....i am playing this game and i love it..........is a very fun because you get to fight tanks....tank hunters.....and artillery even the prototypes that never really saw action you will find every single tank of the WWII era and the specifications of every single piece you will start as a light tank then as you fight and earn point you move on to the medium tanks and form there to the the heavy's.........you can chose the tank that you want to drive as German Russian or American.......you will start as a light with a very slow tractor but you will move to a faster tank as you can check your tank tree so you can find what heavy tank you will get when you became a heavy tanker...you will find in different areas as deserts, mountains, cities and towns........the game is free and played online the only requirement for the game is an email address you will no get any spam or weird emails ever.........you can get this game at www.worldoftanks.com but also check the videos in youtube so you can get the idea about the game...i am really happy playing this game.......see you can learn a lot in this game because the people who make the game do a lot of research in every single tank, tank hunter and artillery piece.....right now i have a t28 Russian medium tank when you get your tank will be like the basic then you will earn points in battle so you can upgrade your armament-motor-suspension as the real thing did it in WWII .........now the after you request your registration they will send you the file game to your email.......then is going to be a link in the email that will take to the server to download the game.....now the file since is a big game will take about 2 hrs to download and after that the install of the game in you computer about 40 minutes but once is done you can start to fight as soonest you select the country for which you want to fight......you will be dead a lot but you will get your points that will allow you to get a better, faster and more powerful gun ....now the specs to run this game in your computer you need a dual core cpu and at least 2 gigabyte of memory now my computer since i am a tech is custom build not the crap of dell or hp ...so i have a video card i will run a test in the coming days in a regular computer to see if a brand name computer will run the game or not...........in the game also you can get as many tanks that you want to buy with your points......so please guys check this game and if any one of you needs help let me know some of my friends and my self are already running a ventrilo program that allow us to talk to each other and we can add any one that want to join us in battle as a team or you can be the lone wolf guts and glory guy that want to find anything in their path or be part of a wolf pack that hunts and destroys the enemy as a team......if any one needs any info here is my emai.......azraelblood_13@yahoo.com.......thanks for you time guys...will see you at the mmeting i guess now is time to destroy that king tiger....latter

Friday, September 2, 2011

Tamiya 1/16 Flakpanzer Gepard


Here are a couple of photos as of Friday.


Just a few more items to add on, then to the paint booth.


Tuesday, August 30, 2011


Here are photos of the completed radar and the in process barrels.


Monday, August 29, 2011

Flakpanzer Gepard as of Sunday evening


Here is the Hull and turret after a weekend of glue.


This kit was originally done in 1978, so the placement of knock out pins has a lot to be desired.


The grill in the photo 2 has many knock out pins on the upper surface. Hence the gray/white putty dots.


I have primed the wheels and the chassis.


I'm a little disapointed in Tamiya in that this is a static model, but most of the mounting points for the hull to the chassis are still nuts and bolts, where the bolts are very visable. I would have thought they would have come up with a single sprue of replacement pieces that could have been glued and not be visiable.