Friday, December 8, 2017

QUICKWAY CRANE

My father operated a Quickway crane while serving with the 291st Combat Engineer Battalion from 1943 - 1945.  He was assigned to a pontoon bridge company within the battalion.  His rig was dubbed "Madie" after my mother (Madeline).  This specific crane was destroyed by artillery at Remagen in March of '45
 
I always wanted to build a 1/35 model of his truck mounted crane and finally last year I ran out of patience waiting for a kit of it , dove off the deep end and tried my hand a kit-bashing/scratch building one.
 
I started with a bunch of pictures, the Hobby Boss White 666 Cargo Truck kit and a bunch of Evergreen Styrene for everything else.

I began with the boom and crane cab.  Dimension came from a single line scale drawing I found on the net.  The cab went together fairly easily, but I think I built 4 different booms before I got it kinda close.
 

In my usual manner I imploded when it came to painting.  I painted, stripped and repainted the darn thing 2 or 3 times (I can't remember cause I think I blacked out during this phase).  Although I'm an armor guy, I sure do hate olive drab paint schemes.


The rigging and the block took some time to get sort of right, but in the end it resembles my Dad's vehicle pretty well.  The interior is finished out with a engine, radiator and cable drums with guards. 

I had a fun time researching and building it and want to do another when my skills improve more.  Mostly I like it because I think of my Dad every time I glance at it out of the corner of my eye.  He passed in 1989, but I sometimes think he is sitting in the cab on the shelf in my hobby room watching me struggle with the darn MENG individual link tracks (man those T-90 ones suck)

Thanks for allowing me to post this - George


My 1/35 Trumpeter "KRUG-a" SA-4.  I spent about 80 hours over June and July this year  building this beast.  After a coat of Tamiya grey primer from a rattle can, I used AMMO by Mig acrylics and Tamiya chrome/silver on the missiles.  I added a figure from TAHK for scale
 I was really pleased with the tracks.  Although individual links, they come off the spruce well and snap together easily.  I think they got the sag look going pretty good
 
As usual, at about 75% complete I messed up.  I was trying to use different shades of Alclad on the missiles and the blue tack painter's tape I was using to mask off panels was too strong and pulled off a bunch of paint and primer.   I stripped the missiles and just went with the old standby Tamiya chrome/silver. 
Overall I enjoyed building and painting the kit.  It only has a little bit of photo-etch (grills) so I'm thinking it would be a "Vince Approved" kit.  I am still learning the whole weathering technique.  I got along way to go with that aspect, along with my photographic skills.
 
Thanks for allowing me to post here.  - George


Wednesday, December 6, 2017

LVT (A) 1

OK.  I promise this is the last completed kit for the year. I started this one in Jan and had a very specific look in mind. This is the old Italeri kit. A few pointers for anyone wanting to build this.
Step one: Throw out the hard rubber tracks and get Fruilisimo replacements.  I Did Not do this.  I struggled through as they kept breaking.  With many staples and sewed up seems, this is the big reason for doing it on the beach.

Notice the wads of seaweed drug along the tracks.  You guessed it, hiding the staples or threads. It does provide a good effect with the turbulence of the vehicle rising onto the beach, tearing up the sand and dragging junk along with it.

 The water is DAP Clear Silicone Caulking. Takes a few days to dry enough to rub some grey / white paint to simulate the foam and waves.
 Since I couldn't have action of the LVT coming out of the water without figures, I cobbled up a few to fit.  Bits and pieces of mismatched soldiers.
While writing this up, I realized I forgot the antenna.  I will get that added now.

Vince B. 12-6-17

Saturday, December 2, 2017

Syrian SU-100

This is the cheap Zvezda kit. I used the few details I knew to convert the Russian end of WWII Tank into what was used by the Syrians in the early 1960s before the Israelis blew them all out.


 The Syrians removed some of the stowage tie bars and added a tool / parts box on the front side.
 I used the STAR decals sheet for the markings. I couldn't tell you what it says.
 This old ZVEZDA kit is not of the newer quality, just reboxed..
Vince B 12-2-17

Friday, November 24, 2017

AML 90

This is the Takom 1/35 scale AML-90 kit. Pretty straight from the box. This is completion #30 for this year.


A few things to be careful of.  This nice armored car was used by Israel, Jordan Egypt, Lebanon etc.  Research which version you are going to build first as thee are some dependent options such as the rear stowage rack, type of mussel breach, spare tire, etc.


The kit comes with real rubber tires. The pioneer tools look great as individual components.

Added some resin stowage bits. 

Be careful of the mirrors.  As with all of these, they tend to break easily when handling. I managed to carefully add a mirror shine.

Vince B. 11-24-17

Thursday, November 23, 2017

Panther A

This is the 1/72 scale Dragon kit. Get out the tweezers if you are going to tackle this one.

I did need to add a few details.  There were no spare track links given but would be typical hanging from the rear deck of a Panther. There was also no commanders machine gun provided.

Must have stowage.  I used  some personal equipment from a Preiser set.

AND added the necessary bucket on every German WWII tank. Be careful of the liable rubberized tracks. They are fragile and snap easily under stretching.

Painted with standard ModelMaster enamels an weathered with oils,

Vince B 11-23

Sunday, October 29, 2017

Panzer IV Arabian

When  starting this Panzer IV (old ESCI kit) I wanted to do something different and was also looking at the new Dragon kits from their '6 Day War' series. I liked the idea of some minor conversions to make it an Arabian.


Since this was in 1/72 scale and I had an old Trumpeter Russian T-72 kit that was going to be parted, I thought this would be a good place to start.  I took the parts for the turret machine gun and found a part to use as a mount.


I also found photos of added tool and parts boxes mounted on the old Panzer IVs.


This will be much more fun in 1/35 scale so will be on my shopping list with Dragon.

Vince B 10-29-17

Saturday, October 28, 2017

Sturm Morser

This is the AMUSING Hobby kit.  Another theoretical German Armor piece. This is a large mortar tube mounted on a modified 38(t) chassis.  Technically this design has some issues. Since this is a Mortar, the large shell would have to be dropped into the tube after the trajectory was set. This would require a scaffold and crane to be set up to lift the shell and manually drop into the tube.

Now onto the kit. AMUSING is pretty good on detail, in some areas (individual tracks) they are too detailed. Each link is 1.5 parts. The links are intended to be workable, as the ends are made that way, but in adding the crossbar, you end up gluing the hinge portion together, so I did this as length and link.

The kit provides a great looking shell and a well done crate.  As you can see, there is no way these could be carried on the mobile mortar.

Of course the kit comes with a very detailed Photo Etch set for the screen and the side skirts. I decided that the skirts were torn off, though I did make them, having to bend tiny parts to form the angled attachments.  After all the work I put into the track I wanted them visible.

 I chose an oddball winter camo scheme. Whitewash faded over a dark gray green base coat. An of course, chipping and rusting. I added some basic personal gear to the side sheet, some plastic and some resin components.

Vince B 10-28

Saturday, October 21, 2017

Iraqi BMP-2

This was a quick build, purchased the kit from Keith last meeting. Old Dragon kit.  Built out of the box, though the kit includes a conversion set from making the BMP to a 2E including Mine Ploughs.  I left those off to adapt to a standard Iraqi BMP 2.


This wont make it to any shows next year as it is for a client who will probably make a Christmas Present to himself.

Vince B 10-22-18

Monday, October 2, 2017

1/144 Morser Karl Gerat

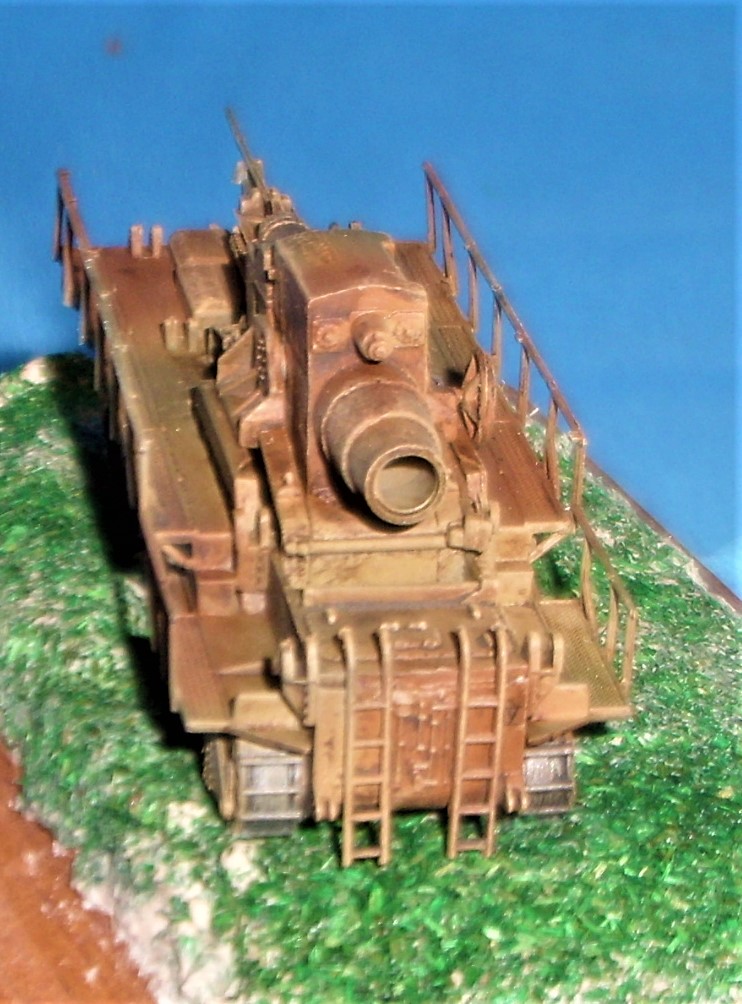
Yes, this is 1/144 scale Dragon Kit.  Yes, I actually somehow completed this with tweezers.

 Fortunately, there was no Photoetch.


Vince B. 10-2-17

Sunday, October 1, 2017

M4A2 Sherman PTO

This is a Dragon kit that I have bene trying to find a good deal on.  I felt I had been neglecting WWII U.S. hardware, so I picked this up in San Antonio in Feb.


I also had been looking for an excuse to try out Value Gear resin products. Coincidentally, they came out with new Sherman bundles whole I was working this, so I bought a few packages to accessorize.


 A few details I added was the Rebar spikes welded to the hull and turret hatches as seen in many of the Pacific Islands photos. I found that using abandoned plastic tow cables worked great to give the textured effect.

 Along with the Value Gear resin bundles, I added other plastic and resin accessories to fill it out.


Using enamels for prime colors, I washed repeatedly with oils and scrubbed in various blue and white accents for the weathering.

Vince B. 10-1-17

Sunday, September 10, 2017

Char 2C

This is the MENG Char 2C in 1/35 scale, one of their earlier kits. This is a real monster of a tank, developed after the end of the 1st World War.


The kit went together really easy with only a few difficult parts. The find piping on the engine deck required some fancy tweezer work.  The grills on the sides were photo etch but set down real well.


The tracks were individual snap together, at least at first.  Too much handling will loosen the fine hold points and you will eventually need to make length and link sections to complete.


I did the final weathering with lots of burnt umber and black washed mixed in with blue and white dot washed and scrubs to get in the streaking effect.  Final details of rust and wear.

Vince B.  Sept 10-17