Monday, March 21, 2011

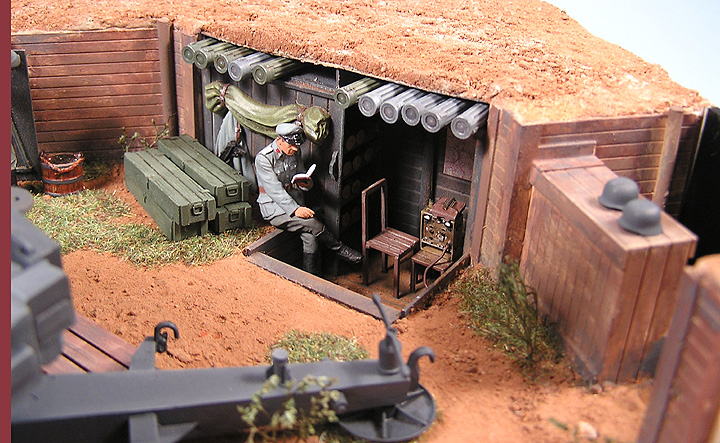
Trumpeter 88mm PaK 43


Built by Tom Moon for IPMS National reviews.

Thursday, March 17, 2011

Book Review Building and Detailing Realistic Sherman Tanks


This is a review of James K. Wechsler's book: Building and Detailing Realistic Sherman Tanks Scale Modeler's How To.

The book is published by Fine Scale Modeler Books, Kalmbach Books.

Having become familiar with Mr. Wechsler's work through the internet and the pages of Fine Scale Modeler magazine, I was excited to hear he was putting out a how-to book on building the Sherman tank. Once the book became available on Amazon.com, I ordered it without hesitation. Having read it, I can only say now that I wish I had hesitated to add this book to my shopping cart. My only solace at this point is that I paid less than the cover price.

The book consists of 103 pages on glossy, high quality paper. Initially, the book is divided into roughly two equal halves. The first half, running 51 pages in length, details Mr. Wechsler's builds of four different Sherman tanks. The second half, 52 pages long, showcases a gallery of 48 different Sherman tanks previously built by Mr. Wechsler. This organization and content is my first major complaint about the book. I bought the book to learn about Mr. Wechsler's methods for building, painting, and weathering tank models. But, for my money, I got only half a book with thay type of information with the rest of the book taken up by photos of previously completed models. In a nutshell, that is not why I bought the book and not what is advertised by the title.

The heart of the book is found in the first half. This half is broken down into four separate chapters, each detailing the build of a different Sherman model.

(1) Perfect Starter Sherman. Here Mr. Wechsler builds Tasca's M4A1 Sherman Late Production kit (35012). He adds some resin pioneer tools from Formatons Models and Cyber-Hobby DS T48 tracks with extended end connectors (or duckbills as they were commonly known). As near as I can tell this set of tracks is now out-of-production. Due to the cost of a Tasca Sherman kit, I must quibble with Mr.Wechsler's definition of a starter model as well as his decision to include aftermarket parts, which a beginning modeler is unlikely to do.

(2) Aftermarket Parts Simplify a Complex Kit. In his second chapter, Mr. Wechsler builds Dragon's M51 ISherman Premium Edition kit (3539). He uses a slew of Tiger Model Designs Aftermarket resin parts.

(3) Maximum Details Improved Groundwork. In chapter 3, Mr. Wechsler builds a USMC M4A2 Sherman using Dragon's M4A2 Tarawa kit (6062). Once again, Mr. Wechsler uses numerous aftermarket parts, this time from Tiger Model Designs and Tank Workshop.

(4) For the Most Accurate Sherman Reach for a Resin Kit. In the final chapter, Mr. Wechsler builds a late war M4A3(76) with sandbag armor. Here, Mr. Wechsler used numerous aftermarket sets from Formations, Legend, and Panda Plastics. The finished model went on a very eleaborate base with several other vehicles, ruined buildings, and figures.
In each of these chapters, Mr. Wechsler produced very nice Sherman models and places them on increasingly complex bases. He also attempts to explain what he did in each build. This brings me to my second group of complaints about this book. First, there are not enough pictures of the model builds. As a result, I often found myself getting lost amongst all the verbiage that Mr. Wechsler resorts to in an effort to explain what he did. Unfortunately, I found myself continually thnking that this process he is trying to ecxplain through words could be shown very simply and clearly with a few more well-captioned photos. Second, gthe pictures that are in the four build chapters are too small and frequently taken from such a distance from the model that it is almost impossible to discern exactly what he did. This is especially true in the parts of the book discussing the painting and weathering of the tanks. To be totally candid, looking at many of those pictures, I could not tell the difference between the tank at point "A" in the process versus point "B." Don't be thrown off by the picture I have included with the review, that is a close-up taken with my digital camera and they reveal details not visible to me while I was reading the book. I think I am safe in saying that a consumer should not be forced to take digital photographs of the pictures in a how-to book to make out what is being done! Finally, I wish Mr. Wechsler had included the cost of the builds in each of the chapters. As a modeler on a budget, that is information I would like to know.

To say the least, I was disappointed by this book. I cannot in good conscience recommend that anyone purchase this book because it just does not accomplish what the title announces it will do: show a modeler how to build and detail a realistic Sherman tank model.


Tuesday, March 15, 2011

My 1/48th Tamiya Jagdtiger and Pzkw III


Gotta give Drew credit for turning me on to these great Tamiya kits in 1/48th! I'm a relative beginner, but am having a blast with these. My current project (just started) is the Jagdpanther. Next up are the Pzkw IV and the Tiger I.

BTW, once upon a time I was a home brewer and as such I have a cylinder of CO2 that I used to use for artificially carbonating my brews. I'm thinking now of converting it for use with my Badger airbrush. Has anyone done the CO2 cylinder thing and have any words of wisdom to offer?

Thanks,
Mark Warnack

Wednesday, March 9, 2011

Ground Work and Diorama Bases

 
Ground Work and Diorama Bases

At our last meeting night, Jorge asked if I would start a conversation about ground work. There are so many people with different experiences in our club, so I will get this started and see if others can throw in their ideas. I know that I have learned some tricks from others.

The fist item is the base. Most of us use a wood platform. There are expensive hardwoods. If you have the means to cut and polish your own, are a good woodcrafter, that is a great start. Knowing how to trim, sand and seal wood is important.

I have had bad experiences with the simple and cheap Pine bases that you find at Hobby Lobby or Michaels. I like to trim the base with a squared basswood. This helps me hold the groundwork in place. The trick with gluing that on, is that you have to be sure you sand off all of the glue smears before you try to stain the wood. This is a lot of work unless you are just going to use paint instead of sanding.

You also need to be sure that you have sealed the inside of the trim completely with an enamal paint or varnish. This will help prevent the wood base from absorbing the moisture of the Celluclay or Sculptamold and warping.

I am going to leave it there and see who else can add to this part of the discussion.

Sunday, February 27, 2011

Hair Spray


The Hair Spray Technique

Like most modelers I like to try new things to add realism to my models so I pick up techniques from others and tweak them to make them my own. A few years ago I discovered what has been called "The Hair Spray Method" while perusing the pages of Military Modelling Magazine. The technique has since been made available to a wider audience through modeling websites. I have used other methods in the past to replicate distressed and fading or chipped paint, but I have found hairspray to give the best results. The best part is that it's easy to do and with a little patience a very good result can be obtained that cannot be replicated with standard brush painting.

Materials you will need:

Hairspray- I use Tresemme Tres Two Ultra Fine Mist straight from the can and find that it gives good results. Whatever type you use, make sure it is an aerosol and not a pump.

Stiff brushes of various sizes - My favorite is a Crayola brand medium round brush that I cut down to make it more stiff. You will also need a wide flat brush to wet the surface of the model in the area(s) you want to remove paint. You can use a variety of sizes to change the effects on the surface.

Water - I use warm water straight from the tap in a plastic cup.

Paper towel and/0r sponge - Use this to remove any excess water from the area you are removing paint and to wipe excess paint and hairspray from your brushes.

The Process:

I strongly recommend trying this technique on a "practice" model first.

1. Paint the base coat on the model as you normally would using the paint of your choice. You can also do any panel fading or tonal variations to the base colors at this time. I use acrylics, but you can use enamels if you are more comfortable with them.

2. Once the base coat is thoroughly dry, apply a sealant coat. I use Future (Pledge) acrylic floor wax to seal the model. Let the clear coat dry thoroughly so it can protect the base coat from the scrubbing to come.

3. Apply the hairspray. I generally put two coats of hairspray on my models to make sure there is adequate coverage of the surface. Hold the can about ten to twelve (10"- 12") inches from the surface to avoid applying an overly thick coat. Let the first coat dry before proceeding with a second coat of hairspray. The first time you do this technique it will look like you just ruined your model while the hairspray is wet, but don't worry too much. As the carrier evaporates, it will tighten down around the details and you can apply your second coat. I recommend applying a second coat, because you need to be sure there is enough hairspray on the surface to remove the layer of paint that will come next.

Note: Because of the finishing techniques I use, I cover the suspension with a paper towel before spraying the hairspray.

4. Apply an acrylic overcoat. (Make sure you are using acrylics for this step because enamels will not react with the water you will use later to remove the paint.) Use a thin coat of paint. This coat of paint should not be overly thick and I recommend that you vary the intensity of the paint in certain areas to accentuate the effect. Let this coat of paint dry at least ten to fifteen (10 -15) minutes before beginning the next step.

5. With the top coat on, you're ready to start removing paint. Fill a cup with some warm water and grab a paper towel or two to clean your brushes as you remove the paint. Dip a brush in the water and apply it to the area where you want to remove the paint. The surface should begin to lift slightly and you might see some bubbles. The stiffer the brush, the more paint will be removed. Make sure to remove paint in logical areas on the top surfaces or sides that might be affected by crew action or moving through terrain. Continue to remove paint until you are satisfied with the result.

If you make a mistake, don't fret. If you remove too much paint in an area or scrape through to bare plastic you can redo the area by repeating the process or using a brush to touch up the area.

6. Apply another clear coat to seal the hairspray and protect the paint from the weathering process. One the clear coat is dry, paint any details as you normally would using the finishing techniques with which you are accustomed.

I have used hairspray for winter and desert schemes as seen in the photos above and have been satisfied with the results thus far. I have seen others use rust base coats to model realistic destroyed vehicles. As with any technique, the more you practice the better you will become. I hope you find this article helpful and use the information to improve your models.


Saturday, January 29, 2011

I started a new diorama

 Hey guys I started a new diorama and wanted to share some of my very preliminary pictures.


I decided to use the very fine Dragon set of very late war Grenadiers.


I needed a tank crew so this set was selected to meet the need.
The general story line is a recon force of Panzer Grenadiers supported by a Wirblewind has run across a RR line. On the other side a few pieces of US armor have been destroyed and a few US soldiers are surrendering.

The Tamiya Wirblewind with a Zestorer 45 conversion from New Connenctions in Germany is used as the main piece. The Zestorer 45 was the 30mm Mk 103 quad mounted on a normal Wirlewind. In reality this was done only in a single protoype but I like to stretch the truth. hehehe

As you can see I like to use blue insulation foam as the filler for my ground work. I'll glue it together with PVA and shape it before I apply the ground work. The RR track is from the Trumpeter line and is used right out of the box.

The jeep is from Tamiya and it's trailer is from CGM productions out of France. It is a signal corps trailer but I'm using it a a general purpose trailer.The lead grenadier is from Nemrod and is resin out of the box. The other figures sport new heads and the tank crew will not remain headless, I'm waiting for a deliver of new Hornet heads form Colorado Miniatures. The base size for this project will be a smallish 12" x 10".  I'll post more later.......

Thursday, January 20, 2011

Type 10 Tank


Japan's New Beast........You Can Find Videos of This Tank in www.youtube.com........We Need a New Tank Here In America.......

Wednesday, January 19, 2011

COMPLETED - 105mm Flak Diorama

 I wanted to build a Verstärkter Feldmässiger Ausbau or a fortefied gun position using a parapet of wood, timber, light concrete or bricks erected around a gun's position. I could have used any gun from the 20mm to the 128mm but I wanted to use the Airmodel 105mm. I used the "German Soldiers at Rest" figure set from MiniArt. They are out of the box but I should have changed them to use resin heads, and will next time. The base is blue insulating foam, celluclay, light Hydrocal, water and white glue. The little detail pieces are from Verlinden, Historex and other manufacturers I have forgotten about long ago. The rounds are New Connections that I found at R & J Enterprises. The shell boxes are scratch built as are the wooden revetments, ammo bunker and planking. I had  fun building this and I hope you enjoy it.


Friday, January 14, 2011

A new diorama I'm working on


This diorama uses the Airmodel 105mm Anti Aircraft gun and the Mini Art "German Soldiers at Rest". Most of the rest is scratch built, along with bits and pieces from Verlinden, DML, Historex, etc.

Thursday, January 13, 2011

Do You Think This is Funny?


I Got it From the NET But Because of The Paint Of The Little Kids .......No The Message Down There

HOW?

How Do You POST in the Tricks and Tips Page?

Wednesday, December 22, 2010


Here is a Picture

Friday, December 10, 2010

Have you ever seen military camouflage like this or is it only for hunting?

I thought it was interesting. The trailer looks like it's old military surplus...

Wednesday, December 8, 2010

Hot Wheels


Some little stuff i would like to buy and park in my garage

Armor Galleries

Check this site under articles and galleries great selection of armor: www.hyperscale.com

Tuesday, November 30, 2010

Tamiya's Old SdKfz. 251/9 Ausf. D Stummel


I added Model Kasten tracks, Verlinden engine compartment, scratch built side bins and much in the engine compartment. The bushes are dried flowers and the herb Marjorum. The branches were simply swirled in diluted white glue and placed inverted in a container filled with Marjurom. The green branches are other dried flowers that look similar to small evergreen branches. The vehicle was painted with Tamiya acrylic paint and shot through an old Badger 200 single action air brush. Filter coats using Humbrol and artists oils were added in varying thicknesses. Final application of matt finish spare varnish thinned with mineral spirits was palced over the stock Tamiya markings. Bits and pieces were added to detail out the vehicle. I was very fortunate to win a 1st place at the IPMS Nationals in Omaha with this piece.

Tuesday, November 16, 2010

Russian Mechanical Engineering Technologies

Great site with lots of pictures of modern Russian equipment. I like the camo on them...

Here's the link:
http://englishrussia.com/index.php/2010/06/28/mechanical-engineering-technologies/