Saturday, August 31, 2013

Sturm Infantiergeschutz

This was another really old Dragon kit. It started as a junker from someone's collection, leftovers. It was going to be sci fi, but as I researched photos, I got more interested in doing it up right; at least close to right.  The base kit was lacking in some extra detail so I scratch built a stowage rack, added stowage and a few other accessories as I found in the photos. Lots of variation and field modifications. 

As usual, I paint with enamels laced with lacquer and heavily dullcoat between layers. Stowage is added mostly prior to painting. Straps are added first for hanging stowage. Afterward, I wash with oils and turpenoid.


Since the track links were individual, it allowed me to plan the sag in the appropriate areas.
Here you can see the stowage rack made from evergreen shapes. I did this in place of the secondary stowage box which is not included with this kit.
 
Vince B  8-31-13

Saturday, August 24, 2013

SdKfz 234/2 Puma

The HAC next in club challenge was for Steel on Wheels. This 1/35 scale Dragon kit certainly qualifies. I wasn't able to find many good photos of the 101 manufactured Pumas. As this kit was well detailed, full of accessories, I managed to do it out of the box.

  Base colors were model master enamels of light sand over a dark green Floquil Lacquer. Last bottle of my stash. After several dullcoats, washes, and drybrushings, I added some pigment powders in layers under the wheel wells and on tires.


Vince B  Aug 24-2013

Saturday, August 3, 2013

SdKfz 250 in 1/35 scale

 This is an old Tamiya kit. I had been studying photos of the vehicle Rommel was famous for and had intended to use the Greif markings. I had also found some good detail references of various interiors including cabling of the radios and headsets. Some of that I scratch built from bits.

 It was more fun to do the add ons so I decided Not to do the specific vehicle

 I did several layers of washes and dull coats to achieve the overall worn out effect of the vehicle and its stowage. The basic kit seemed to lack a lot of detail so I added stuff from my spare stowage bins. I use painters tape for making straps.
 
Vince B.  8-4-13


Here are some photos of the M8 Greyhound Light Armored Car I just finished.


Tom

Wednesday, June 12, 2013

Tuesday, May 28, 2013

Tiger I

I just finished the very old Tamiya kit of the Tiger I. I depicted a well worn tank in service with Romel's AfricaCorps. This is out of the box so there isnt really much to tell. I painted with enamel and weathered with oils. I did add a final dust and grime finish to the track and road wheels since I decided to do groundwork.

Sunday, March 10, 2013

Stop Horsing Around

It seems like I need to do one diorama each year. The concept for this one was inspired by an old WWII photo of a horseman delivering a message to the crew of a Nashorn. I gathered up an old Dragon kit and some figures which would help me reenact the spirit of that photo.

The title "Stop Horsing Around" came from none other than Paul Sacco. The title fit, unlike the old Dragon kit. I fought my way through it. I wasn't able to find many good quality photos of the Nashorn in action, but I wanted to set the scene at the end of the long winter on the Russian Front. The surviving equipment would have been worn down and rusted out.
 
I painted the Nashorn with the original camouflage pattern of green & brown and then white washed it. I simulated the combination of rust and worn paint with lacquer thinner and oil washes.
 
Now it's time to take a break and get back to Sci-Fi for the summer.


Friday, March 8, 2013

Tamiya M26 Pershing

This kit came out about 6 years ago. The OOOOhhh AHHHH feature was some spring suspension of the tosion bars. Not all that big of a deal. As with most Tamiya kits, this was great as an' Out of the Box' build. This particular subject wasnt in any of my program plans, but I picked it up for $15 so I thought I would throw it together.


 I was pleasantly suprised to see that the rubber band tracks were completely gluable. No staples or sewing needed to secure the seam and the tracks even glue to the road wheels. As usual, I painted with Model Master enamels. I mixed some Forest Green with white to lighten the shade which I later toned darker with the Burnt Umber and Black oil washes. I tried to keep this one relatively clean, no heavy wear or rusting.
 
I also have a new technique for rough terrain ground work.

Tuesday, February 26, 2013

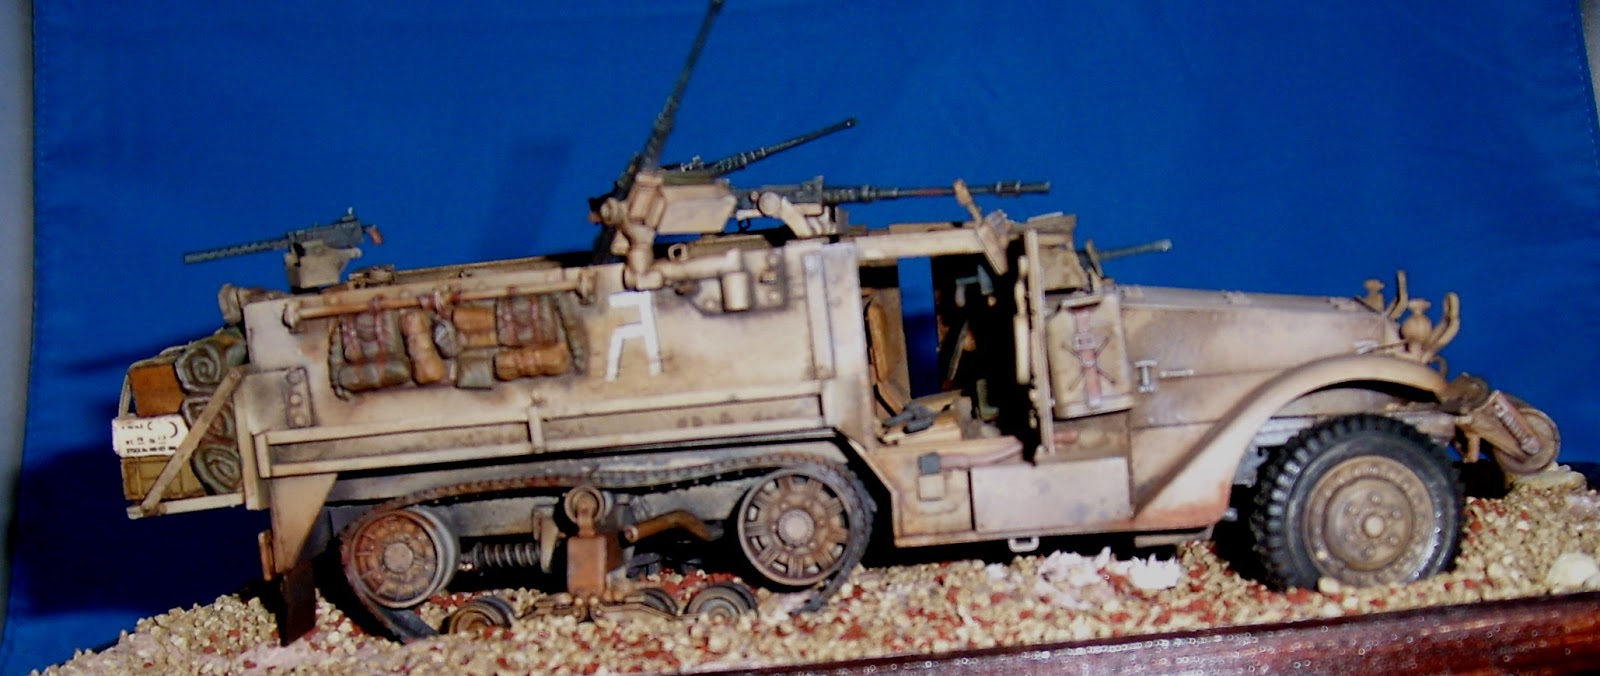
Israeli M5 Halftrack Guntruck

It is surprisingly complete. This originated as the old Tamiya M3 Halftrack troop transport. When I first selected the IDF M5 as the subject of the "Second Hand Armor" challenge, I didnt realize how much the Israelis modified (cut and welded) this American made vehicle. There was a lot of scratchbuilding going on and it aint perfect, but close to the reference photos I collected of the variations of this vehicle.


Then I began adding the detail stowage on the exterior. I always glue the straps in place before adding te stowage. These are strips of painters tape. I wrap these around the tie bars then glue on the backpacks, crates etc.


Once I had as much of the detailing as I could stand, I base coated / primed the entire model in a dark gray color using a mix of Model Master enamels. I believe French Chestnut and Black.
 
Next I lightened the model with the base color and worked up the details from there. I detail painted the equipment and stowage. Then I dullcoated / soaked it with laquer dullcoat to seal in.
 
Next came the light wash with oils do darken the shaed of the overall vehicle. After that I selected some appropriate decals and set with Floor Wax over the rough surface.
 
After sealing in the decals with another dullcoat, I did the heavy wash with the Burnt Umber and Black oil paints. Another dullcoat and ready to set up the  groundwork. I use Sculpy mixed with elmers glue and an acrylic brown paint. While it is still wet, I coat it with Woodland Scenics glue and sprinkle on various types of gravel. I pressed in some larger stones while the glue was still wet. As it dried I pressed in the model.
Afterward I did some detail painting of the head and tail lights, mirrors and coated with Crystal Clear.


Sunday, February 17, 2013

Shelf Queen II - The Final Chapter: Panzer III H cont'd

I know the suspense was just awful having to wait to see how this old shelf dweller would turn out after the original posting back in September last year.  After all the extra detailing to bring this old kit up to more current standards, I decided to take my sweet time with the finish.

As is my usual custom, I started painting with a dark base coat.  In this case I used some Tamiya Nato black to take care of all the nooks and crannies since the model was painted basically complete with the exception of the stowage on the rear deck and the air recognition flag.  For the finishing coats on the upper hull, I used a combination of Tamiya dark grey and field blue mixed to about 70 - 80% grey to approximately 20 - 30% blue. I don't tend to use exact measures when mixing so this is my best estimate.  I followed this up with a lighter coat mixed with a small amount of Tamiya buff to tone down the color and provide some highlights to all the horizontal surfaces.

For the lower hull and running gear I used a combination of Tamiya colors mixing flat black with flat earth followed by some khaki and desert yellow to bring out the highlights on the shock absorbers, escape hatches and wheels.  These highlight colors were heavily thinned to provide maximum control with the airbrush and were floated around the back of the tank and onto the fenders to give the effect of kicked up dust.  I should mention here that the road wheels were finished with a base of Tamiya dark grey and after all the earth tones were applied I finished them up with a brush painting of Vallejo dark rubber to get rid of any overspray.

I decided on 11th Panzer Division markings and used Archer Fine Transfers for all the decals.  Even though they are dry transfers, I still used some Micro-Sol to help snug them down over a gloss-coated (Future acrylic floor wax) surface.  After the decals were applied, I sprayed a second coat of Future over the entire model to seal them and provide a nice smooth surface for the washes and weathering that would follow.   A glossy surface helps to control the washes and avoid a splotchy appearance that can be caused by flat coats.

As I mentioned earlier I painted the stowage and air recognition flag off the model to avoid any mistakes and make them easier to finish.  The air recognition flag was base coated in flat white and then I made a circle template with some Tamiya masking tape so Tamiya red could be applied over the top.  The swastika was outlined with a Micron .5mm pen and filled in using a fine brush with Vallejo flat black. As a final touch, Vallejo dark red was used to provide some shadows on the flag.

The model sat for a few weeks over the holidays, and when I returned to kitchen table I painted all the tools and details using various Vallejo acrylics.  I am often asked how I paint the tools on my models.  I don't really have a secret method other than to say that I paint each tool handle in a different way on each model so that no two tools look the same.  I find that the different colors provide more visual interest on an otherwise plain looking vehicle.  I always use Vallejo colors and I generally start with colors that provide a good base for wooden handles like flesh, sunny skin tone, dark yellow, and others.  I typically apply two coats and once this base is dry, I follow it up with several washes of saddle brown, red leather, or any other combination of similar tones. For the metal parts, I either use flat black or dark gray.  I use flat black for models with a dark base coat and dark grey for those with a lighter base.  This helps avoid too much contrast.  Once the model is complete (including any sealing coats) I use a Prismacolor pencil and a graphite pencil for the metallic sheen.     I vary the formula to make sure each tool is slightly different than the others.  

For washes I used Windsor and Newton oils and mineral spirits as well as some of the MIG 502 Abteilung oils.  I used some of the earth tones to dry-brush the lower hull and suspension after some washes and I must say that I was really impressed with these colors.  They did seem to take a while to dry, but they are really easy to clean up.  I used Abt170 German Grey Highlight to dry-brush some of the upper surfaces.  It blended well and I really liked the overall effect.  To finish up, I mixed some Tamiya flat base with Future to seal the model and used the Prismacolor to highlight the sprocket teeth and track cleats.

While these older kits are not up to the standards of today's technology, with a little TLC and some extra details they can still produce good looking models for about half the cost (or less) of the latest generation kits.


Sunday, February 10, 2013

Frantentank (Ivan Der Wolfe)

Frantentank (Ivan Der Wolfe)

Well, its done...


And yes it does light up.


Tuesday, December 18, 2012

Cool!

From Gizmodo;

Is This the Job With the Best Views of the World? 


 and it's real. Not photoshoped.

For more:
http://gizmodo.com/5969246/is-this-the-job-with-the-best-views-of-the-world/gallery/1

Saturday, December 8, 2012

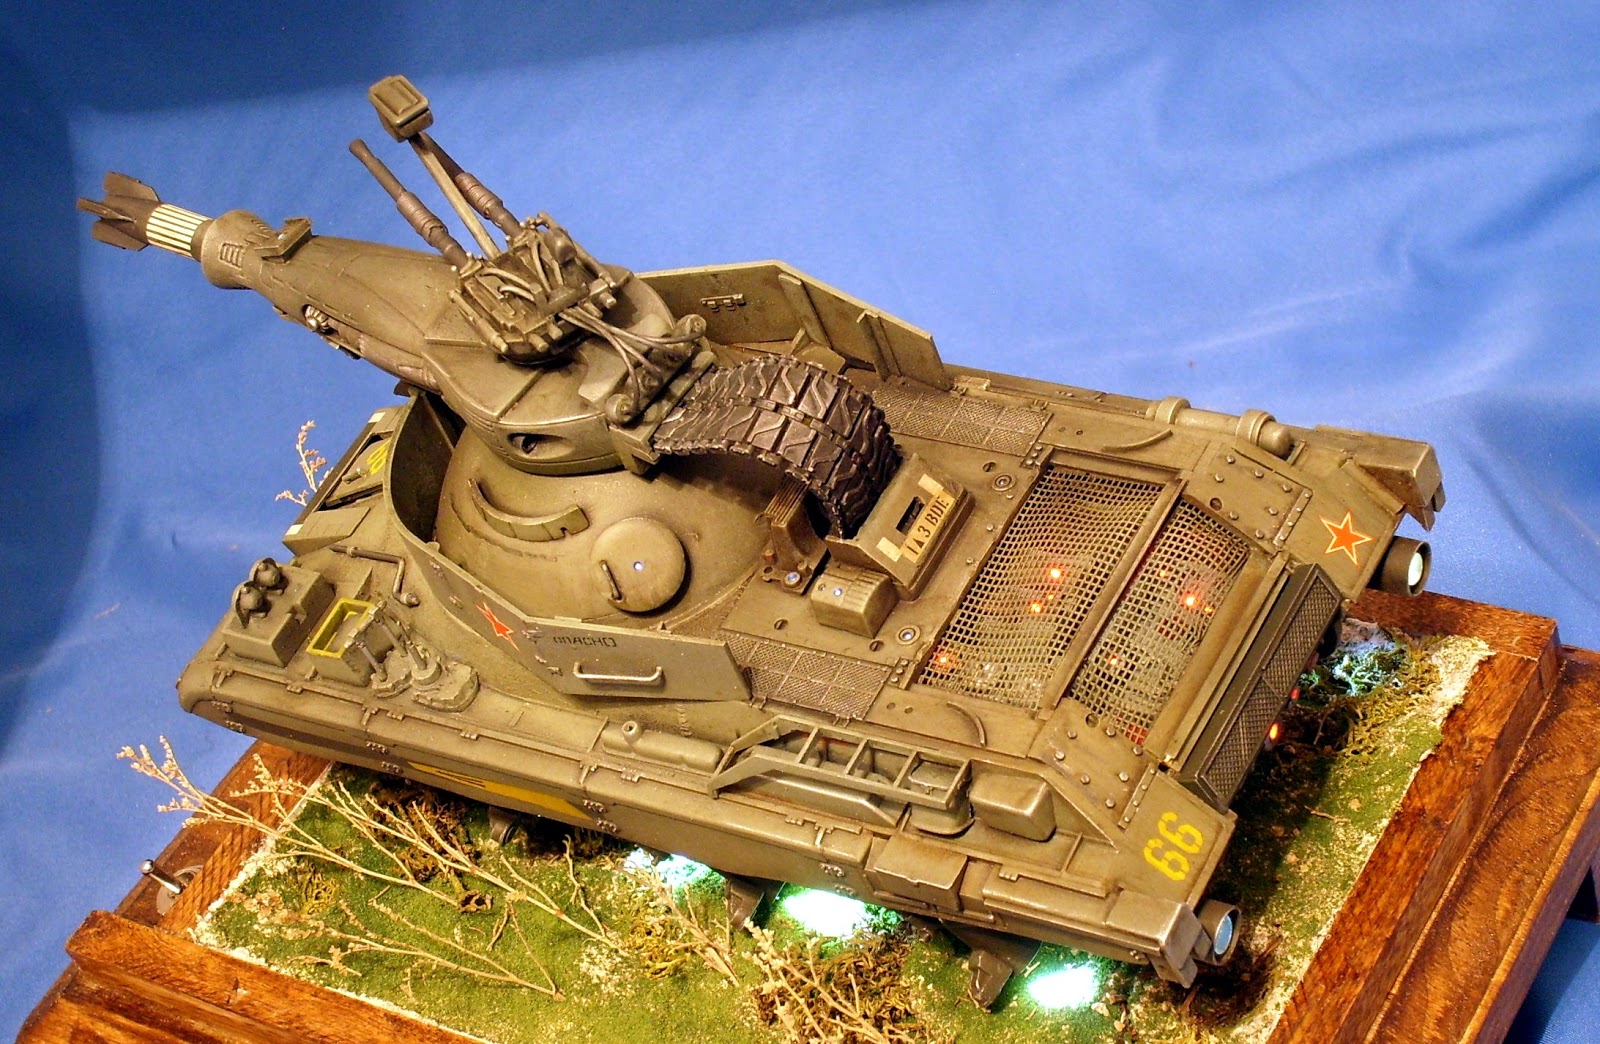
Frankentank (Big Bad Wolf)

 Once I had a general idea in mind for the shape and function of the tank, I decided toput some light on the subject starting with the engine compartment. This is the main power drive for the 6 hover lift and guidane engines and the 2 power thrust engines.


 I designed the engines from plastic and brass tubing inserting super bright LEDs inside and wiring all to the internal hull.
 
 Tha main gun is a belt fed cannon system while the upper gun is a particle beam weapon. These opperate independantly from each other, rotating on a spherical axis.
 
 The upper hull is from some WWII Russian armor. Notice the screened in power plant compartment on the rear deck.
 
Vince B.  Dec 8, 2012.


Monday, November 12, 2012

o.k once again guys here some stuff that i found may be a cartoon but at least have tanks in.......you can find the rest in youtube.com by searching for girls and a panzer

http://www.youtube.com/watch?v=VAAnUqhKWZI&feature=related

here is one link for you guys the rest is in youtube  have fun.