This is the recent Trumpeter kit of yet another not so feasible German Artillery piece. Not sure if this monster was even on paper, but you will see it up close at the HAC Club contest in May.
Since this was entirely hypothetical, I decided to try a new camo pattern. I painted it with the dark Panzer Gray first. then I cut strips of tape to make a random cross hatch pattern and re-painted lightly with a lighter shade of blue gray.
Of course I had to add some stowage since the kit didn't even have grab handles on the massive slab sides. I put in some baskets, ammo crates etc.
The commanders hatch also did not have a machine gun so I added a ring and gun from a Tiger tank. Also needed to add Pioneer tools around the tow cables.
Wednesday, January 31, 2018
Tuesday, January 30, 2018
1/72 Jagdtiger
This is the Italeri 1/72 Jagdtiger. Not really a new kit, but I do like the Length and Link Plastic tracks.
I did add on some stowage details, resin crates and some equipment from Preiser.
The kit details are OK, certainly not a Dragon kit. The fit was good and the Decals worked well.
I also added some fine mesh to the intake grilles.
I did add on some stowage details, resin crates and some equipment from Preiser.
The kit details are OK, certainly not a Dragon kit. The fit was good and the Decals worked well.
I also added some fine mesh to the intake grilles.
Monday, January 1, 2018
Armor, sort of. . . . . ( a tale of unachieved expectations)
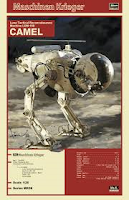
The kit is a 1/20 scale Maschinen Krieger from Hasegawa. By my account it's about 30% SciFi, 30% armor, 30% aircraft and 3% heart breaker. There is really good detail in the cockpit but because of the tint of the canopy it is hard to see inside once completed. The plastic is a little thick for my taste which leads to some pretty hefty seams. Yep, I said SEAMS. (aka The Heart Breaker of this story). I haven't had to deal with seams since I stopped building aircraft 5 or more years ago. In fact it was seams that got me out of the hobby for a number of years and the root cause of my migration to armor.
Although the filling, sanding and hiding of seams took its toll, I pushed through the fabrication and got the kit ready for the paint stage. From the beginning I had decided to have the thing look Russian, so I chose to give Hataka's acrylic Warsaw Pact AFV Panel Lighting Set a try. I usually try to stick with a manufactures own thinner, but since I could not locate any I went with isopropyl alcohol. BAD CHOICE. The mixture appeared good in the small plastic cup I was using, but when loaded in the airbrush and an air stream applied it turned into a Russian green Jello substance instantly clogging my airbrush. Next I tried Tamiya's acrylic thinner and that pasted up even before it got out of the mixing cup. In the end the only thing that worked was demineralized water. Luckily I test shot each attempt so no paint stripping was required.
For me, this was one of those builds that you generate great expectations for, but the darn thing fights you to the end. I had some cool visions of an all weathered up vehicle with rust and dust all over the place, but in the end it was all I could do to somewhat finish it. There were three areas I did have some fun with. (1) The painting of the canopy frame. Maybe a little to bright, but I wanted it to pop. (2) I used a bunch of aircraft decals and stencils and mostly (3) I experimented building a bunch of ammo boxes covered with tarps located in the corner of the base.
This was my 5th and final completion of 2017 and with all the excitement I had in my mind when I started this one, it kind of finished with a fizzle.
Thanks for looking - George
P.S. Sorry about picture quality, I need to take some lessons from Eric or at lease revisit his presentation.
Mid summer I was feeling pretty good. I had strung together 2 or 3 pretty decent builds (for me) with each one an improvement on its predecessor. I decided to step out of my newly found comfort zone and try something different.
I found this kit while killing time on e-bay. It had been started and in the end I got it at a reasonable price ( I think around $30 all in vs. $100 new). I wanted to stay with a military/armor sort of theme so I thought this thing could be morph'ed into a futuristic Russian scout type vehicle. My imagination got pumped up and by the time I received the kit I was chopping at the bit to get going. I did not know it, but the best times were already behind me on this one.
The kit is a 1/20 scale Maschinen Krieger from Hasegawa. By my account it's about 30% SciFi, 30% armor, 30% aircraft and 3% heart breaker. There is really good detail in the cockpit but because of the tint of the canopy it is hard to see inside once completed. The plastic is a little thick for my taste which leads to some pretty hefty seams. Yep, I said SEAMS. (aka The Heart Breaker of this story). I haven't had to deal with seams since I stopped building aircraft 5 or more years ago. In fact it was seams that got me out of the hobby for a number of years and the root cause of my migration to armor.
Although the filling, sanding and hiding of seams took its toll, I pushed through the fabrication and got the kit ready for the paint stage. From the beginning I had decided to have the thing look Russian, so I chose to give Hataka's acrylic Warsaw Pact AFV Panel Lighting Set a try. I usually try to stick with a manufactures own thinner, but since I could not locate any I went with isopropyl alcohol. BAD CHOICE. The mixture appeared good in the small plastic cup I was using, but when loaded in the airbrush and an air stream applied it turned into a Russian green Jello substance instantly clogging my airbrush. Next I tried Tamiya's acrylic thinner and that pasted up even before it got out of the mixing cup. In the end the only thing that worked was demineralized water. Luckily I test shot each attempt so no paint stripping was required.
For me, this was one of those builds that you generate great expectations for, but the darn thing fights you to the end. I had some cool visions of an all weathered up vehicle with rust and dust all over the place, but in the end it was all I could do to somewhat finish it. There were three areas I did have some fun with. (1) The painting of the canopy frame. Maybe a little to bright, but I wanted it to pop. (2) I used a bunch of aircraft decals and stencils and mostly (3) I experimented building a bunch of ammo boxes covered with tarps located in the corner of the base.
This was my 5th and final completion of 2017 and with all the excitement I had in my mind when I started this one, it kind of finished with a fizzle.
Thanks for looking - George
P.S. Sorry about picture quality, I need to take some lessons from Eric or at lease revisit his presentation.
Subscribe to:
Posts (Atom)