Wednesday, November 30, 2016

VK 4205 (P) Hintern

This is just one of the King Tiger Prototypes that wasn't chosen for production.  I couldn't find any photos of the real thing so I am not sure it made it off the drafting table.

This is the Hobby Boss kit, which I was pretty impressed with. To start, the turret detail interior was so fine that I had to leave open all of the hatches and put a light in it.  Still cant see all of the detail inside without taking the turret off.  I even left out the ammo to help see inside from the rear hatch.

I did paint this up and add some markings to represent it in action as if it had been manufactured. I like the grey color scheme.  I used a combination of Gun Metal and blue to create the warn effect, then did the usual layers of oil washes.

The tracks were individual half links.  Two pieces per length so you had to be sure to keep them alternating in order. I sis this in length and link sections to be able to fit the wheels and sprockets. There were extra links  so I made some stowage racks on the turret to hang them.


Vince B. Dec 1

WWI Whippet

I found out this was named after a dog.  This is the MENG kit out of the box. I am really happy with the ease in which this went together and the quality of the detail. I think the Russian scheme in grey came out nice as well using two layers of dark grey enamel and a lot of oil washing and dullcoat.


The tracks were really good to assemble and provide a lot of flexibility, workable to fit on the road wheel assembly.

In researching this on line, I learned that the long portion was a front mounted engine, so the crew compartment of 4 is in the rear.


 Vince B. Dec 1


BMW R75

Well, this one was a challenge for me in 1/35 scale. These were leftovers from John Fords collection. Mixture of, I believe Italeri and Tamiya components.  I believe these kit were from the same molds?  Anyway, since I didn't have directions on the side car, I had to rely on the photos I found on the internet.  Building this taught me some about how it functioned mechanically.  I had not realized that the side car wheel was powered from the motorcycle through it own transmission.

I added missing details like SOME of the wiring and cables for throttle and ignition. The side car didn't have the machinegun mount so I found parts and stowage to put that together.

I didn't have decals so needed to go to my decals scraps to find the suitable markings.


Vince B. Dec 1.

Monday, October 31, 2016


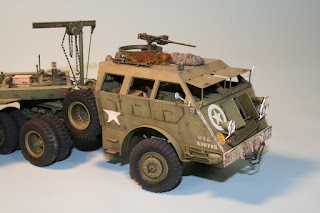
Here's my Tamiya M-26 Dragon Wagon in 1/35 scale. The M-26 tank transporter is made of a M-25 cab and a M-15 trailer. This is my favorite model of all time. Even now, several years later, I still get a charge out of looking at it. I placed it in its own case, so it is as fresh today as the day I bought it at a model show in 2001, complete with an aftermarket photoetch set. I finished it in 2010. I got my inspiration to finish this kit after I attended a AMPS Regional show in Indiana where I saw both some outstanding models and an actual M-26 recovery vehicle. It really inspired me to try new things and to finish this beast.

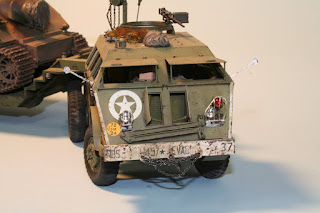
I used burnt umber Model Master enamel paint for the paint chips and used a Scotchbrite pad, toothpicks, and a small paintbrush to apply it. Tamiya supplied real rubber tires with the kit. I spent several hours sanding the tires down to make them more worn. I left the spare tire in "like new" condition.

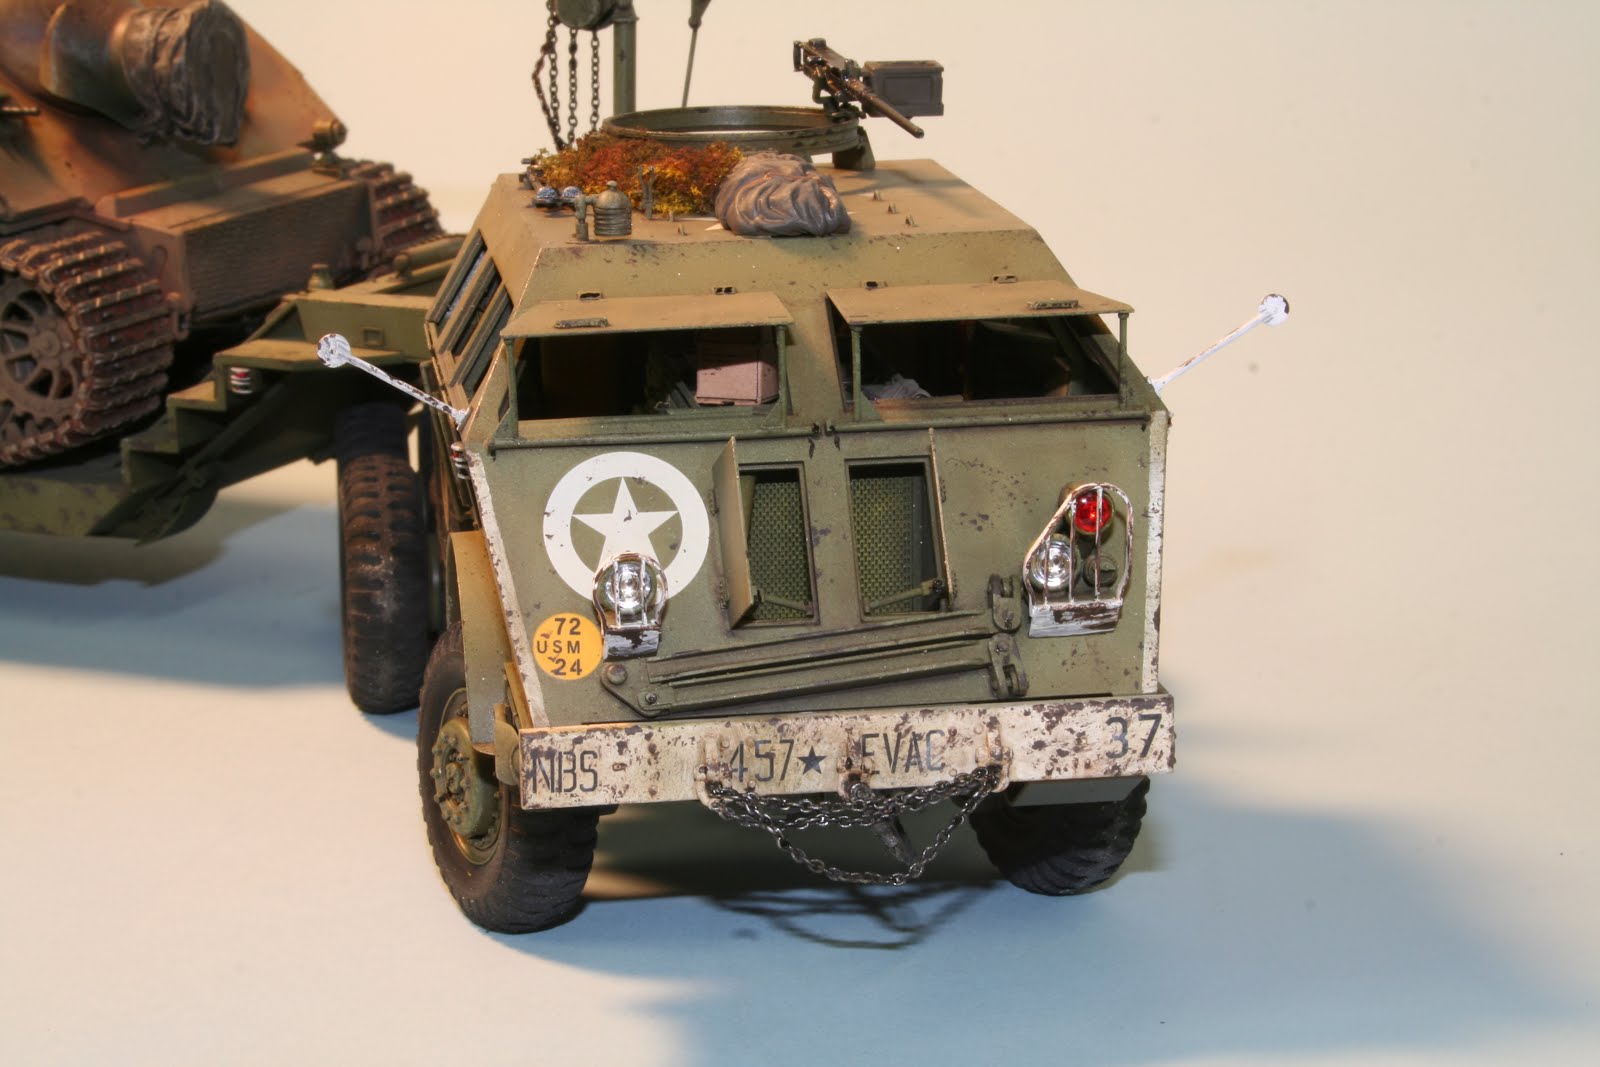
Here's a bit of trivia: the cab of this truck may seem familiar. I believe the modelers who worked on the second Star Wars movie "The Empire Strikes Back" used the cab design of this truck as the basis for the Imperial Walker...not the big one, but the little one with only two legs that has several scenes in the movie.
Image result for at-st
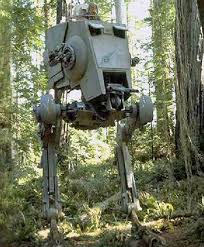
Imperial AT-ST for comparison


Tamiya provided chromed headlights. I think they really work well, but I have yet to see any other armor kit have this feature. Too bad.
 
The cargo is a Sturmtiger...I forgot which mfg. made the kit. I did add zimmerit by using a hot screwdriver blade. Over time, the barrel broke, ruining the model...or so I thought. I fixed that problem by adding a tarp over the barrel and tying it off with a piece of rope. The funny thing is, this transporter probable couldn't carry this vehicle. The capacity was 40 tons max but the Sturmtiger was well over that. And get this...the M-26 had a 240 hp engine...about what you can get in a Honda Civic today.

I first tried panel fading, rust marks, and streaking grime on this kit. I went just a little too far with the chipping but I was having so much fun I didn't stop.
I don't participate in model contests. I added an M-16 rifle in the cab just to irritate people who might look that closely into the interior.
I hope you like this model!

Saturday, October 22, 2016

Iraqi T-72

This was built from an old DML kit. I had not done any Iraqi armor, but it was suggested by someone who had been buying my models on E-Bay. Once I did some research and found out about a few modifications, I was interested in trying.

Some of the special Guard tanks mounted US M113 commanders cupolas around the Russian machine gun.
I found many photos where the front tow cables eyes and hooks were painted red. This added a little color to a monochrome yellow tan subject..
I also learned that what I thought were thin steel side skirts were only thick black rubber mud flaps and in many cases weren't even painted.

I found someone on E-Bay who made specialized decals and had a sheet with various scales of Iraqi and Iranian flags for armor markings.

When I finished it on Friday, I offered it to the guy who suggested it, sent him these photos, and he bought it, so I wont be able to bring it to a meeting or enter it in any contests.

Vince B  Oct 22

Monday, October 17, 2016

Sunday, September 11, 2016

Skoda PA-II Turtle

Its easy to see why this vehicle was designated Turtle.  Tis is the new Takom kit. Not much to it. No interior and not that many parts to put together. It can be confusing though as which was is the front does make a difference, though this vehicle did seem to dive in both directions. 


Crazy to think that this thing had a crew of 5.  2 drivers, 2 gunners and a commander.  I believe there were only 13 of these vehicles made in this configuration with the 4 ball mounted machine guns. There was another version modified to have a cannon. This was not actually used in WWI but produced after the war.

I airbrushed a base coat of Gunmetal.  Then rolled worm strings of that Therapy putty and randomly crisscrossed these strings around the vehicle until I had patterns similar to those shown on the color charts.  I then carefully airbrushed in sections of random colors, varying the shading as shown.  I covered sections again with thinned out sheets of the putty until I had all sections painted. Once removed and cleaned, I did the basic glossing and oil washes.


Vince B 9-11-16

Friday, August 26, 2016

Renault FT 17 Practice

This is from the old RPM kit.  As I said above, this was for practice for when I get the MENG kit. The first version I did had various errors from the poor instructions. Once I researched photos of the real Renault FT 17s, I saw all of the parts in the wrong places, or backwards etc.


So, I started over since I had parts from 3 variations of this kit left over from the John Ford collection.  I also for the first time tried out Fruil tracks, which I happen to have for this kit. One of the reasons I called this practice. I learned how to weather the white metal tracks as well as adding some missing details on the kit.

Sunday, August 21, 2016

Chrome Magnum

OK. I finished another Gundam kit. This is still what they call 1/144 scale, but for my purposes is 1/72.

I built the kit out of the box except I actually use glue, paint and occasionally, putty. I do use my own decals from scraps. Most of the Gundam Club just snap them together from the box with whatever colors are appropriately manufactured on the sprues.

Funny thing yesterday at the build that they actually noticed I was using liquid glue. My concoction does usually smell funny.


Vince B.  Aug 21. 2016

Tuesday, August 16, 2016

M998 Gun Truck or (Who Spilled the Ice)

This was an Academy kit. After having done a lot of web searches, I found that I could do just about anything with this subject and it wouldn't be wrong. It makes me feel like doing another one with even more modifications.


I added stowage everywhere that I could find used from web photos. I really liked so many of them had spare tires strapped to the hood or the front grill so I stuffed the center with more stowage.
I used Tamiya tape for all of the stowage straps. I also added components from the MENG modern stowage set which included some nice coolers. I just had to open one up and fill it.

 I had several clear water bottles and found some useless decals to wrap around them. Cant even tell what they say, but looks like a water bottle label. I stuffed a piece of water soaked toilet paper in and covered it with watered down Crystal Clear.  While it was still wet, I sprinkled in some table salt and stuck the bottles to it.
 I included some spare ammo  and fuel cans and crates, tents and personal stowage for the crew.

Vince B. Aug 16

Sunday, August 7, 2016

St. Chamond in the trenches

 OK. I have completed the groundwork to show the St, Chamond approaching a barbed wired trench emplacement.


I thought it would be fun to make a WWI colorized exposure.


Sunday, July 31, 2016

Takom's St Chamond Early version

This Takom stuff is really nice. Takes some getting used to, having everything fit exact as it shows. Hard to not try to anticipate and correct something that doesn't need correcting. Treat it like an old Tamiya kit with way better detail and accuracy. Best part is NO PHOTO ETCH.

I learned a lot about these French WWI tanks as I was studying. This early version was a monster and had 5 or 6 crew. Basically it was a tractor with steel riveted plates around it.  The drive train and track suspension assembly was very intricate but if you follow the steps it works out well.


 I will complete the build by inserting the model into a battlefield trench setting with barbed wire fencing and posts being pulled apart.


Vince B.  July 31-2016

Thursday, July 14, 2016

HobbyBoss 1/48 KV-1

This is the captured KV-1 tank, repainted and marked with German ID.   The kit went together well.  There were some photo etched fidley bits, but I got through it. The detail was great and a good fit.


I added on some resin stowage.


The kit tracks were plastic length and link with preformed sagged on the return rollers.  This was impressive.

 Vince B.  July 14


Monday, July 11, 2016

M42 Duster

This is the really old Tamiya kit with all of the battery & motor fittings in the lower hull.  Since I am going to screw it down to the base and groundwork, I didn't bother to fill all the openings.


The kit lacked a lot of detail based on the photos I researched on line. I packed it with stowage and made some minor corrections.  The ammo provided in the kit was way undersized.  I went to my supply rack and found more suitable substitutions.


 I decided to do this as the US Vietnam version, though I was confused on several details.  I found what I believe were early war photos where there were no flash suppressors.  I found what I think were post VN versions with a wire bracket around the flash suppressors.


Each vehicle had its own personality as well as a name in most cases. I did use the decals in the kit, though I did find actual photos of this subject online with a different personality.

The mud was a concoction of my dried out air brush sludge mixed with some Burnt Umber oil paint.  The sludge had dried to chunks which I ground down into powder. This worked out great under and behind the road wheels in the lower hull.

Vince B July 10.