Wednesday, May 12, 2021

Panzer IV Ausf. D

 This is the old 1/48 Bandai kit. Out of the box with some added stowage. Very basic beginners kit, but it matches a 1/35 scale Tamiya kit I am building as well. Will make for a good comparison later.
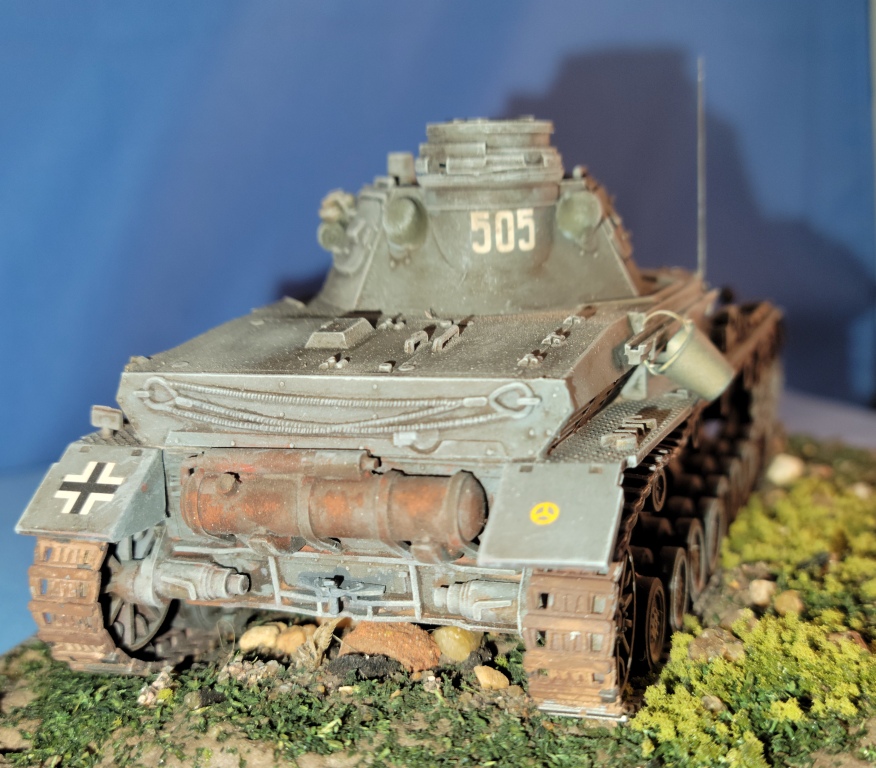
I didn't do anything special, just painted, washed, dry-brushed and pigmented. The tracks on this are horrible and would recommend replacing with Fruils for a serious build but why waste them on an old Bandai kit.

Since I didn't do much to this it wouldn't last 5 minutes in a contest so I consider this E-Bay Fodder. 
Of course I used Modelmaster Enamels and mixed my own colors of blues and greys. Washes and weathering was done with mixed oils and pigment powders.
The bits of stowage were Black Dog. The spare tracks were from Tamiya kit. Yes, there is a bucket. I did have to add decals as the old ones disintegrated. 

Vince B.
5-12-21


Monday, May 10, 2021

Flakpanzer Panther with 37 MM Guns.

 This is a 1/35 Takom kit which comes with both the quad 20mm Turret and the 37mm Turret, which can be used interchangeably. Both turrets are complete.  

I used the Photo Etch screens on the engine deck so didn't want to cover them with stowage. I used oils and pigments for the weathering and rust. 
I chose to use the Fruil tracks as I didn't enjoy inserting the guide teeth sets into the length and link tracks  that came with the kit. 
The kit is great. The only fit issues were those I caused myself on the rear plate with the stowage and exhaust. 

I decided to keep the base simple and used a section from a Miniart set. The street lamp looked cool so I cut the plastic dome and inserted an actual bulb. No, it doesn't light up. 


Vince B. 

May 10-2021

Wednesday, May 5, 2021

HASAGAWA NUTCRACKER 1/35


Finally done. I actually finished the M.A.K. series Nutcracker last year, but never mounted it. The kit actually came with two 1/35 scale Mech suits. They are "Gustav" (left) and "Melusine" (right). These things are models in their own right and I am glad that I took the time to complete them.
The construction was easy enough, just different than building armor. Only one of them had  cockpit figure, but the modeler is supplied with two different heads for the "pilot"...for each suit. So, I have three spare heads that can be used for other projects. I painted them with a base coat of Tamiya Dark Yellow, then I masked them with putty and applied Tamiya JGSDF Green and then Tamiya NATO Brown. Once that was done, I gave them a gloss coat, paint chipping and then a pjn wash. After that I applied some Uschi Polishing Powder in selected areas, and topped them off with some Vallejo Pigments. I think they came out ok.
Once my little buddies were completed, I added them to the base with the Nutcracker. The nutcracker was a decent kit, and I had no complaints. Everything fit the way it was supposed to and there were minimal seam to putty over.

I painted the Nutcracker with Tamiya Dark Yellow, Tamiya Red Brown, and Tamiya Olive Green.  I then applied the German Ambush Camo dot pattern. 

i gave her the standard treatment (Gloss, Pin Wash, and Dull Coat heretofore known as the GPD treatment). The I applied a little bit of chipping and some pigments.

Since this is a Hover Tank, I had to mount it so that it appears to be hovering...like a Hover Tank. Once again, I used grout for the ground work with some Woodland Scenics Grass and Turf. I have been wanting the build this kit for while and I am glad it is finally competed.