This one is a bit of a stretch. Though Germany did have many women soldiers, mostly in non combatant rolls, this displays a final desperate measure of putting women in combat. "Wehrmachthelferin" = Wehrmacht Auxiliary.
The tank is a Trumpeter kit with pre-stamped sheets of Zimmerit. The kit went together well, including the individual wing nuts on the tool clamps.Saturday, January 1, 2022
"For the Fatherland" Wehrmachthelferin
Sunday, December 12, 2021
Desert Cats / Desert Foxes / Barbie's Chariot
Finally got this finished. This is an Academy Merkava Mk.IV LIC built almost box stock. The ball-and-chain armor was made by putting drops of super glue on the ends of the included photoetch chains. Strangely, even though the kit is of the LIC variant, it only comes with 2 of the 4 LIC corner markers, so I scratch built all 4 using resin spring mounts and fiber optic line. The flag antenna was made the same way with an ETA Israeli flag attached. Using Meng Namer kit parts for a master, I cast a stretcher out of Milliput to hang on the back of the tank. I also replaced the link-and-length kit tracks with SanXin Model assembled metal track.
This model represents a tank of the Edom Division, Paran Brigade, Caracal Battalion. The Caracal Battalion is a mixed sex battalion with some all-female tank crews. The crew figures are from Miniart, Black Dog, and Royal Model.
The shield on the back of the turret basket is the insignia of the Paran Brigade. Some tanks carry them and they are hand made by the crews out of wood. Mine is made from sheet stryrene. I also hand painted most of the white markings on decal paper as I could find no proper decals for this battalion.
Stowage is from Black Dog and the rear basket covers are made from parchment paper. AFV Club Anti-Reflective Glass stickers were used on the kit glass (seen as metallic yellow and red in the photos).
The base is longer than needed because it has a cover which is needed to clear the figures and the flag. The only case with proper height was extra long. It would be nice to put something in that space, but I don’t know what.
Also don’t really have a firm name for the diorama (vignette?) yet. “Desert Cats” is a play on Desert Rats using the fact that a Caracal is a wild cat. “Desert Foxes” seems a bit sexist even though a fox is on the insignia of the Edom Division. “Barbie’s Chariot” came from the fact there is a tank in the US Army called “Barbie’s Doll House” because its commander is a woman (and Merkava is Hebrew for chariot).
Update: Added Israeli army logos in that blank spot at the end of the base and settled on the name "Hannah and Her Sisters".
Thursday, November 18, 2021
Meng Namer, part 2
You have seen the beginning of the building of the new Meng kit of the IDF Namer in the post below. There are several of us in the Houston Armor Club that are building this wonderful model. In fact, there are several reviews in the blog discussing various steps in the building of this kit.
Here are 2 pictures of my build, painted and ready for the weathering steps. Go get one, or two, it is a great kit!!
Enjoy your build!
Tuesday, November 2, 2021
MENG NAMER
This is my latest project. The Meng IDF Namer in 1/35 scale. The kit is molded in grey and is nicely detailed, to the point of having the anti-skid texture molded in the upper hull.
The kit gives the modeler the opportunity to build one of three versions, and I have chosen the command version of which I will be posting photographs of my progress.
To date, the wheels and suspension are assembled and I will begin adding more pieces to the upper hull as the machine comes together.
Thats all for now, but I will keep you all posted and the project progresses.
Happy modelling!
Sunday, October 17, 2021
1/35 AFV-CLUB SHO'T KAL GIMEL
This is the AFV-CLUB IDF SHO'T KAL GIMEL in 1/35. This kit was a struggle to build. I started it in July and finished last night. The only joy I had during the process was the painting and weathering. There is much discussion about color for IDF vehicles and in talking it over with folks in our group, it has been shown through research that the color has changed over the years, so the year that the modeler intends to showcase will drive the color choice. The good news is that there are a number of manufacturers that have products available to cover these colors with reasonable accuracy. Since I was going after the 1982 War in Lebanon, I chose Vallejo's Sinai Gray '82 71.142.
Tuesday, September 21, 2021
T-34/D30 122mm Syrian Self-Propelled howitzer
This is RFM (Ryefield Models) #5030, in 1/35th scale.
It is painted with MIG paints; Sand Yellow #0030 is the primary color, then Zashchitniy Zeleno (Russian green) and Shadow Rust added as the camo.
This is the first time I pre-painted the wheels and tires before assembly. Turned out quite nicely.
This kit is nor for the faint-of-heart. It was a booger to build. I had many issues, and am not sure if it is the kit, certainly some of it is the kit, or me, probably a little bit too. My first issue came in Step 4, assembling the length-link tracks. Following the instructions, combining parts C-1 and C-3, the length was too long. I had to alter on the C-1 links by cutting it in half.
In this picture, you can see the shortened track, and the putty necessary to hid the fit issue.
In Step A-9, you are supposed to use PE to make the fuel tank straps mounted on the rear. I could not get them to correctly bend and mount on the rear panel so I rummaged thru my spare parts and found acceptable parts to use as the tank mounts. Once I got the fuel tanks mounted to the rear plate, I discovered that the hull was warped where this assemble would join the hull. Had to do some pushing and shoving to get it super glued in place.
The sub-assembly in Step B-7 has lots of fiddle-bit parts. Mine kept breaking off the gun, I had to super glue it in place several times. Looking back the the instructions, I am certain this aiming mechanism is incorrectly glued in place.
Now for the interior. Wait--there is NO interior!! As you can see from the first picture, I made a rudimentary fire wall, front axle and driver and gunner seats.
You can barely see the seats with the hull on!
Then I painted and washed the interior, very heavily. I added Mini-Art ammo cases and shells, 2 AK-47s, various packs and a fire extinguisher.
And finally with the hull on, I added Mini Art green wine bottles to add some color to the interior.
Monday, September 6, 2021
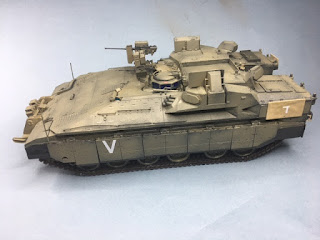
Meng Namer, IDF Heavy APC
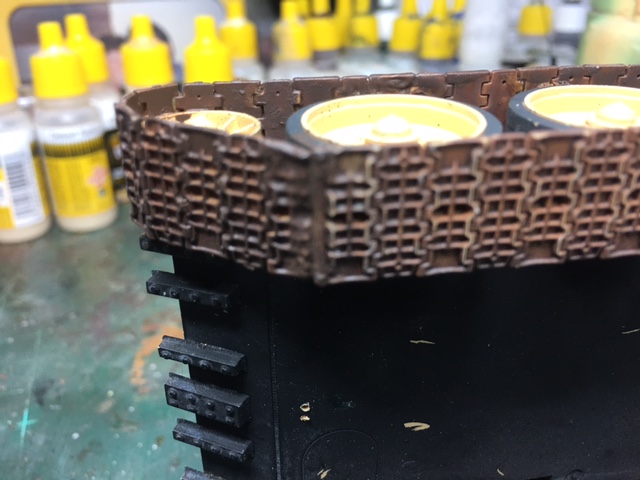
This is the first of a multi part series regarding the kit build. It includes tips, tricks and warnings discovered while building the kit.
Session 1 https://youtu.be/5x_MUW5hiig
Session 2 https://youtu.be/nIm0VSfSQu4
Session 3 https://youtu.be/Mb8YH8Uc1Yw
Session 4 https://youtu.be/GN5E9wMs8xA
Friday, August 6, 2021
Jagdtiger
The Tamiya 1/48 Jagdtiger is similar to the Sturmtiger of my previous Blog entry. As you can see the main difference is in the gun.
The End... literally. Same great details on the jack and tools.
Sunday, July 25, 2021
Sturmtiger
Tamiya 1/48 scale kit with added zimmerit. This was one of those easy kits... until you get to the missing details. Like what you ask?
Wednesday, July 14, 2021
Panzer II C
This is a 1/72 PzKpfw II Ausf C from First To Fight. It is a simple kit that comes with a small magazine of a few pages containg photos, drawings, & info about the object being modeled. Unfortunately, the magazine is all in Polish.
Model was painted with Model Master acrylics and weathered with oil paints. I used the base to practice applying static grass with my applicator. The grass used is 4mm long.
Emart RGB LED Photography Lights
Monday, July 5, 2021
Panzer IV Ausf. D
Now I have completed the Tamiya 1/35 scale version to compliment the Bandai 1/48 scale version I completed a few months back.
Friday, July 2, 2021
Marder Madness
My latest fling has been modeling the German Marder. Of course I had to find and buy all the Marder variants that existed (originally trying to stay in 35th scale). Sometimes the chase to get what I want is as much fun as building the kits. I've got three under my belt so far, the latest being the 35th Marder III from Tamiya. I strayed a bit with the 48th scale Tamiya kit of the III just because it was cute. None of them are finished, each sort of stalled here at the end. I'm going to try to finish them this holiday weekend. I'm still learning with the whitewash and the mud, but I'm getting there,
To my eyes he Marder I looks to be kind of disproportional to the III. I did not really notice it until I saw the pictures. Both are Tamiya 35th, so I'm just thinking it's me.
I used Ammo by MIG acrylics for all the painting and the foliage is photoetched. I took photos on my iPhone on my workbench.
Thanks for looking - George